Azure Virtual Machine Deployment: Building a Secure and Scalable Infrastructure with Virtual Networks and Resource Groups
A Beginner's Guide to Creating Virtual Machines in Virtual Networks and Resource Groups for Seamless Cloud Computing.

DevOps enthusiast and cloud aficionado | Sharing insights and expertise on all things DevOps and Cloud | Join me on a journey of continuous learning and innovation | Let's unlock the true potential of modern engineering together | Connect with me to explore the exciting intersection of DevOps and Cloud!
Introduction:
In the world of cloud computing, virtualization has revolutionized the way we build and manage infrastructure. Among the key components of cloud infrastructure in Azure, three fundamental concepts stand out: Virtual Machines, Virtual Networks, and Resource Groups. Understanding these concepts and their relationship is crucial for effectively deploying and managing resources in Azure.
Virtual Machines (VMs) provide a scalable and flexible solution for running applications and services in the cloud. They mimic the functionality of physical computers, enabling us to install and run operating systems and software just as we would on a physical machine. However, VMs offer the added advantage of rapid provisioning, scalability, and the ability to consolidate multiple VMs on a single physical host.
Virtual Networks (VNets) play a vital role in establishing secure and isolated network environments within Azure. A VNet acts as a virtual representation of a traditional network, allowing us to define subnets, IP address ranges, and network security rules. By creating a VNet, we can segment our resources into different network segments, control traffic flow, and establish connectivity between our virtual machines and other Azure services.
Resource Groups act as logical containers that help us organize and manage resources within Azure. They provide a way to group related resources together, such as virtual machines, storage accounts, and virtual networks, for easier management, billing, and governance. By organizing resources into resource groups, we can apply consistent policies, set access controls, and manage the lifecycle of resources collectively.
By combining these three components, we can create a robust and scalable infrastructure in Azure. Virtual Machines enable us to run our applications, Virtual Networks provide network isolation and connectivity, and Resource Groups offer a streamlined way to manage and organize our resources effectively.
In this blog, we will dive into the step-by-step process of creating a Virtual Machine within a Virtual Network and Resource Group in Azure. We will explore the necessary configuration options, best practices for security and performance, and tips for optimizing our infrastructure in the cloud. So, let's get started and unlock the full potential of Azure Virtual Machines, Virtual Networks, and Resource Groups!
Step-by-Step Guide: Creating a Virtual Machine in Azure with Virtual Network and Resource Group.
First of all sign in to the Azure portal at https://portal.azure.com.
Create Resource Group :
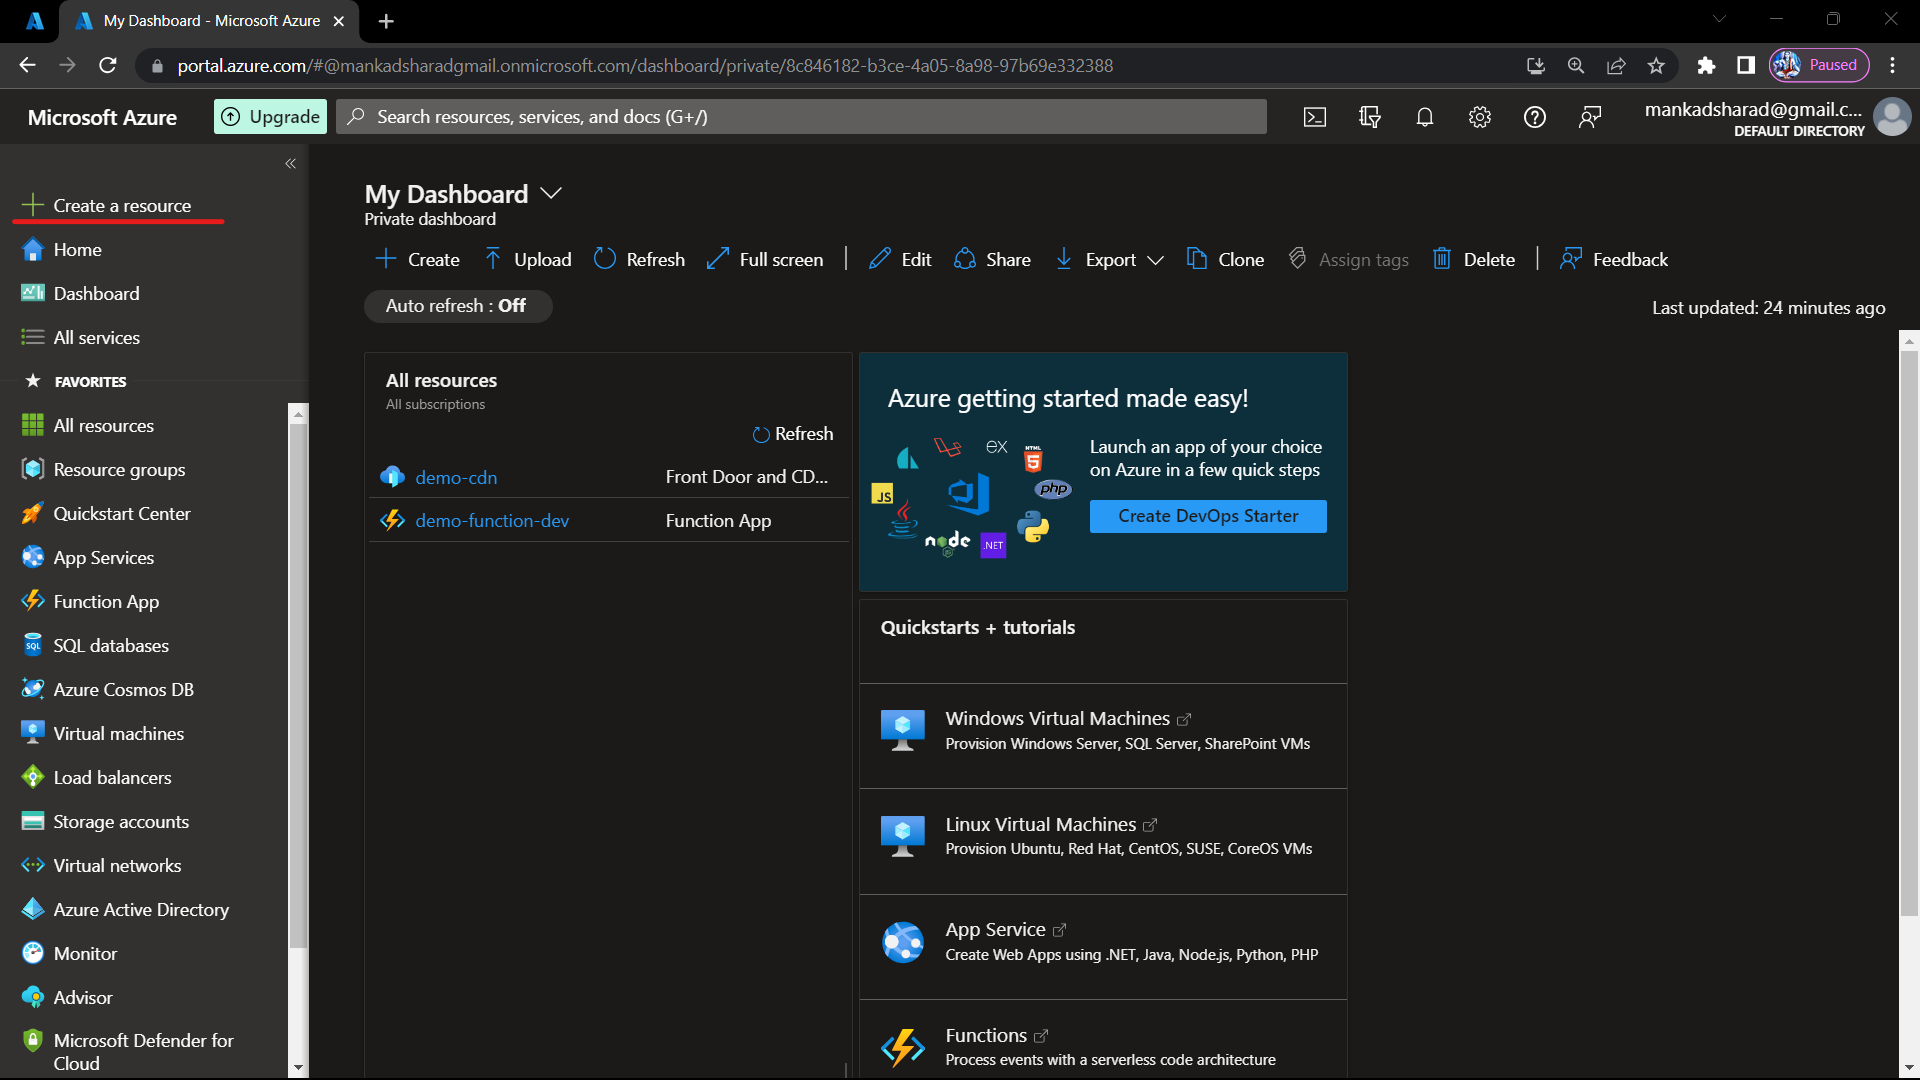
Step-1 Click on the "Create a resource" button (+) in the Azure portal.
Step-2 In the search bar, type "Resource Group" and select "Resource Group" from the search results.
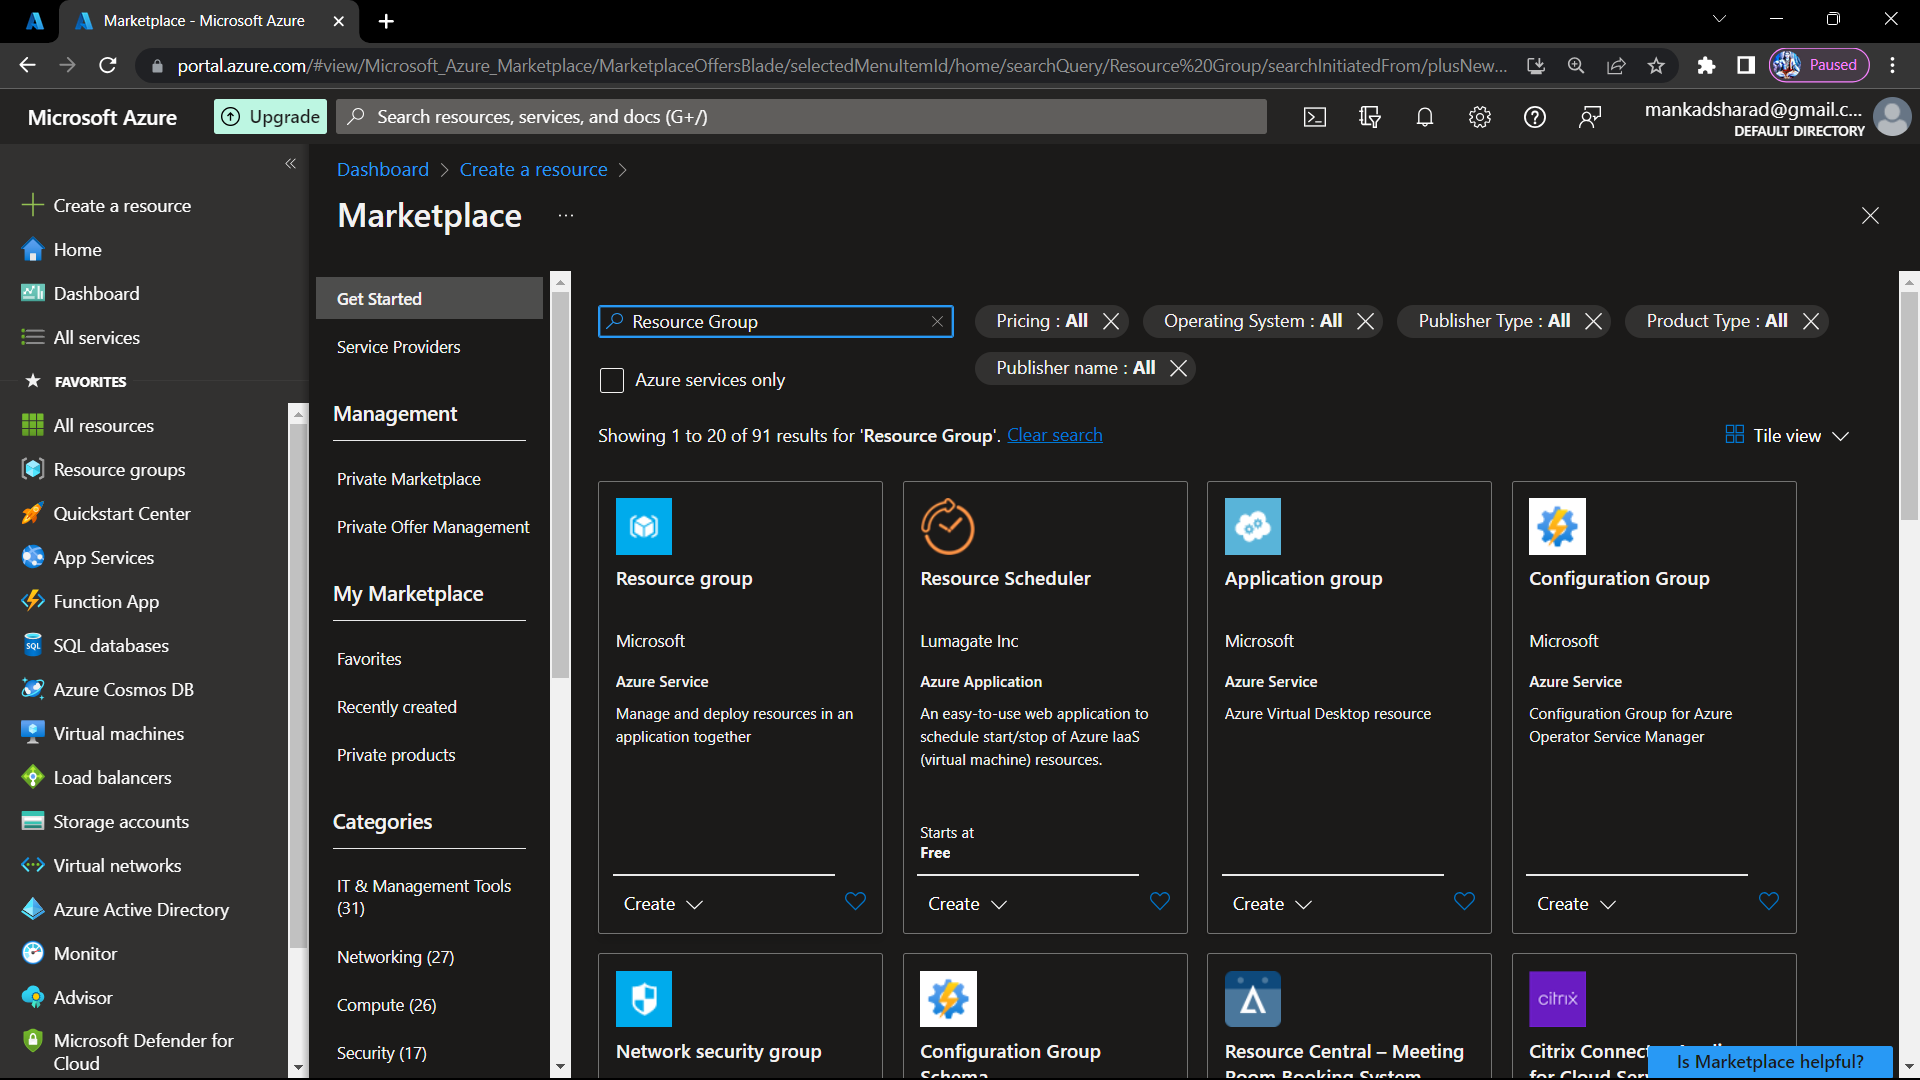
Step-3 Click on the "Create" button to create resource group.

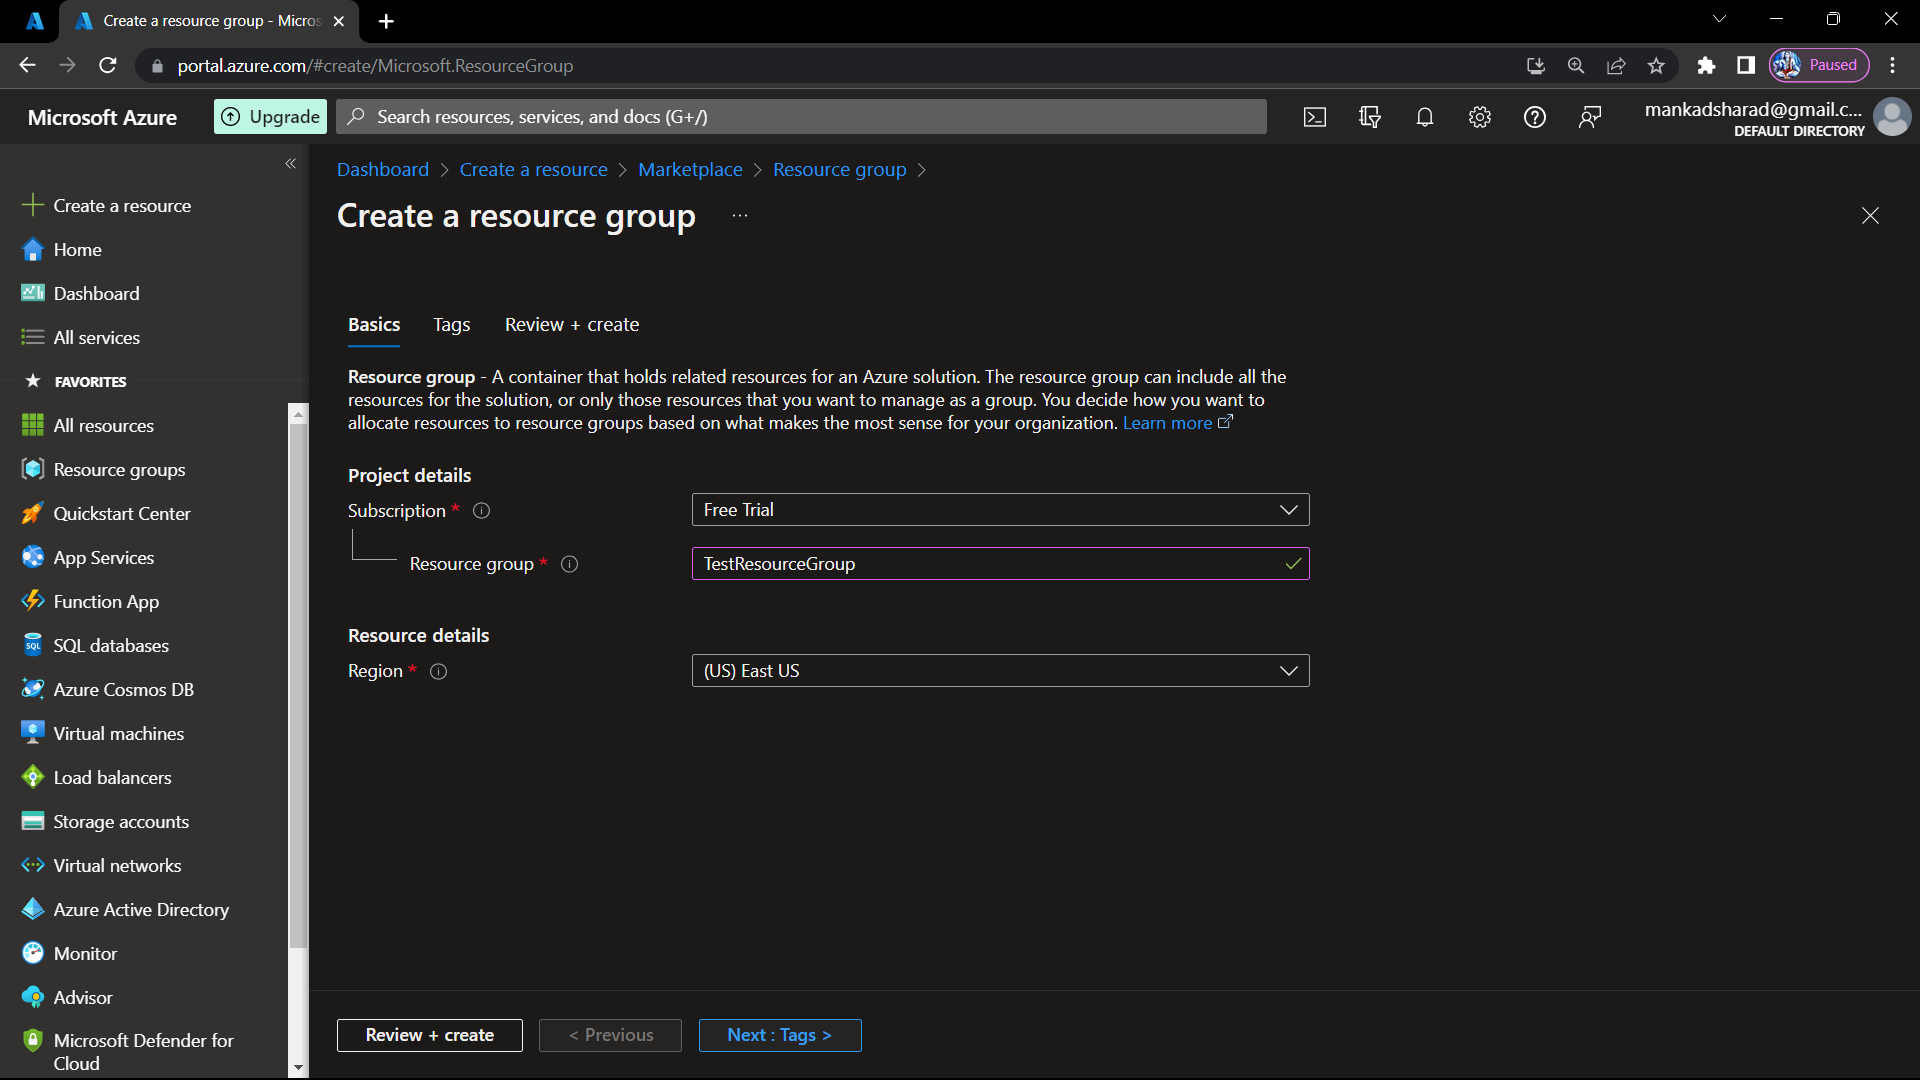
Step-4 Now, select the subscription we selected here as free trial, entered the resource group name as TestResourceGroup and choose the region. after entering details click on next button.
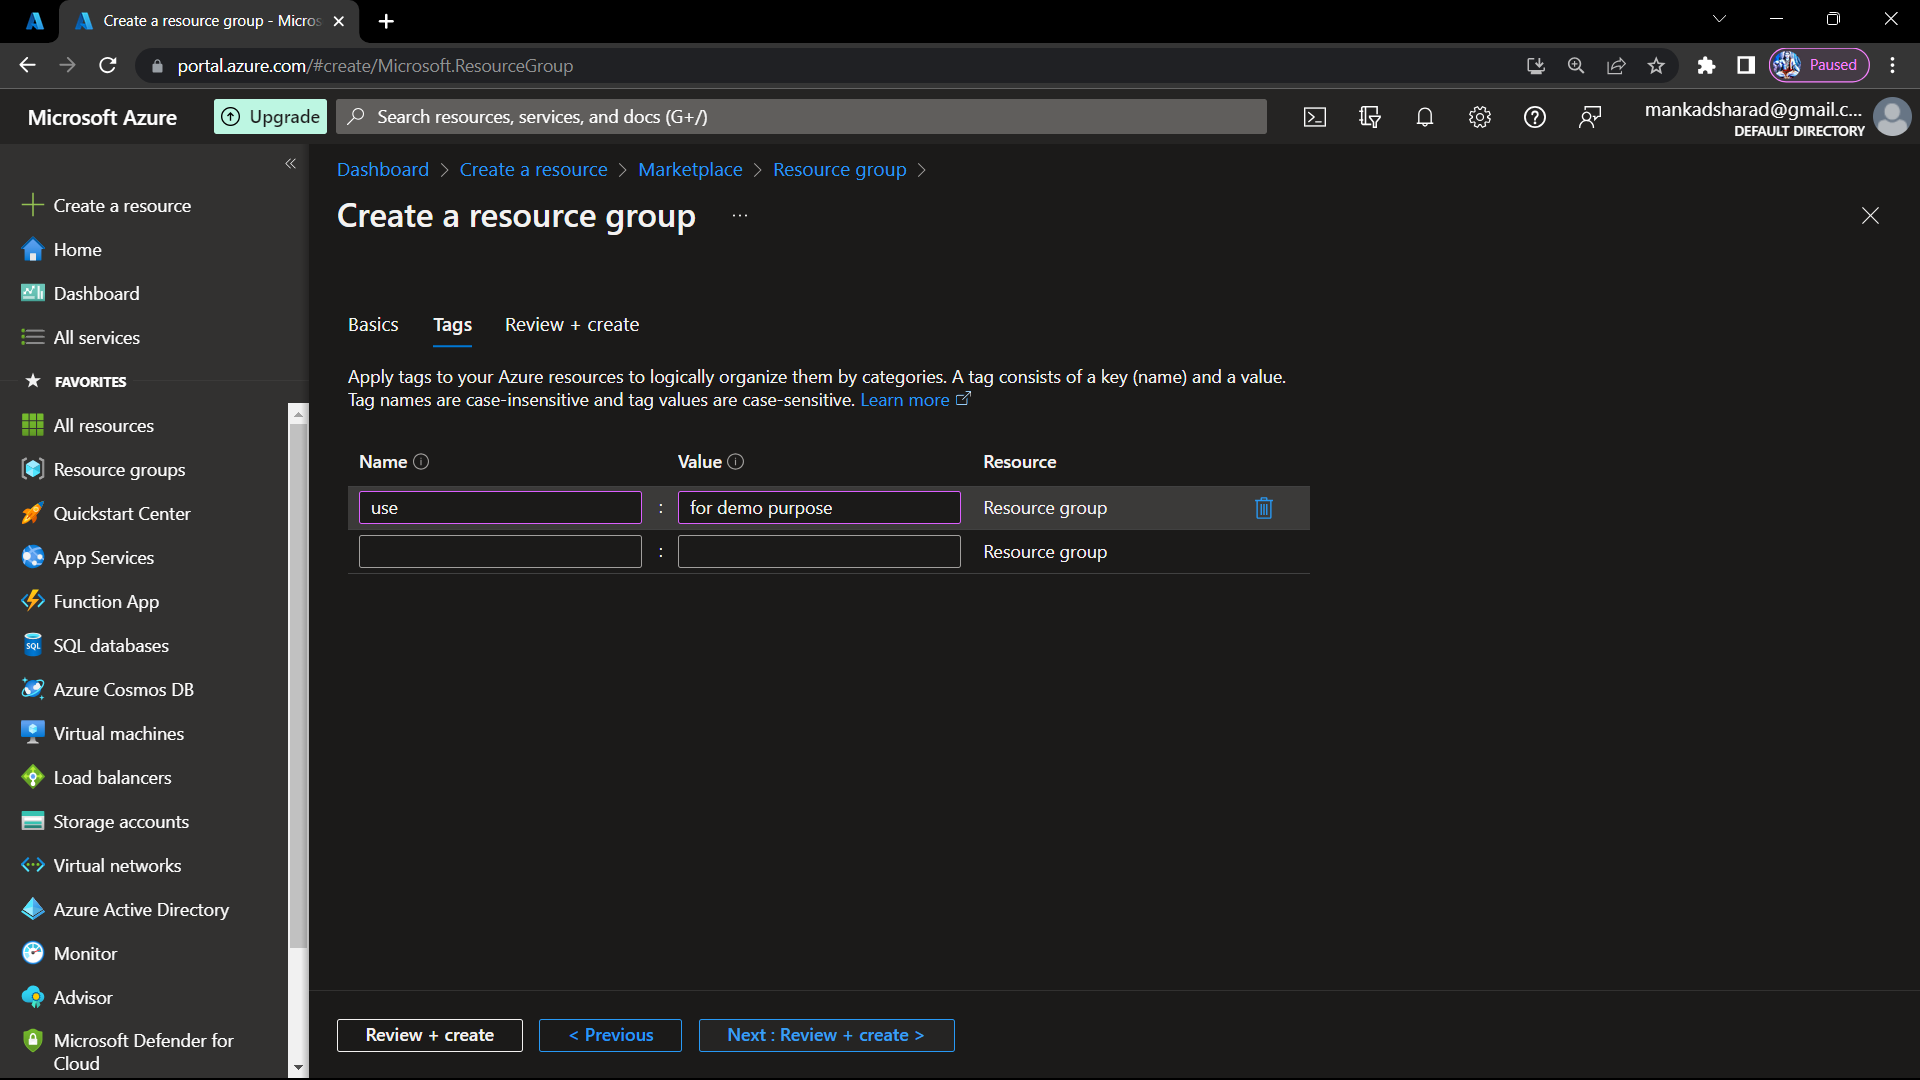
Step-5 We entered the name-value keypair here also we can keep it blank. click on Next : Review + create.
Step-6 Check all the details and click on create button
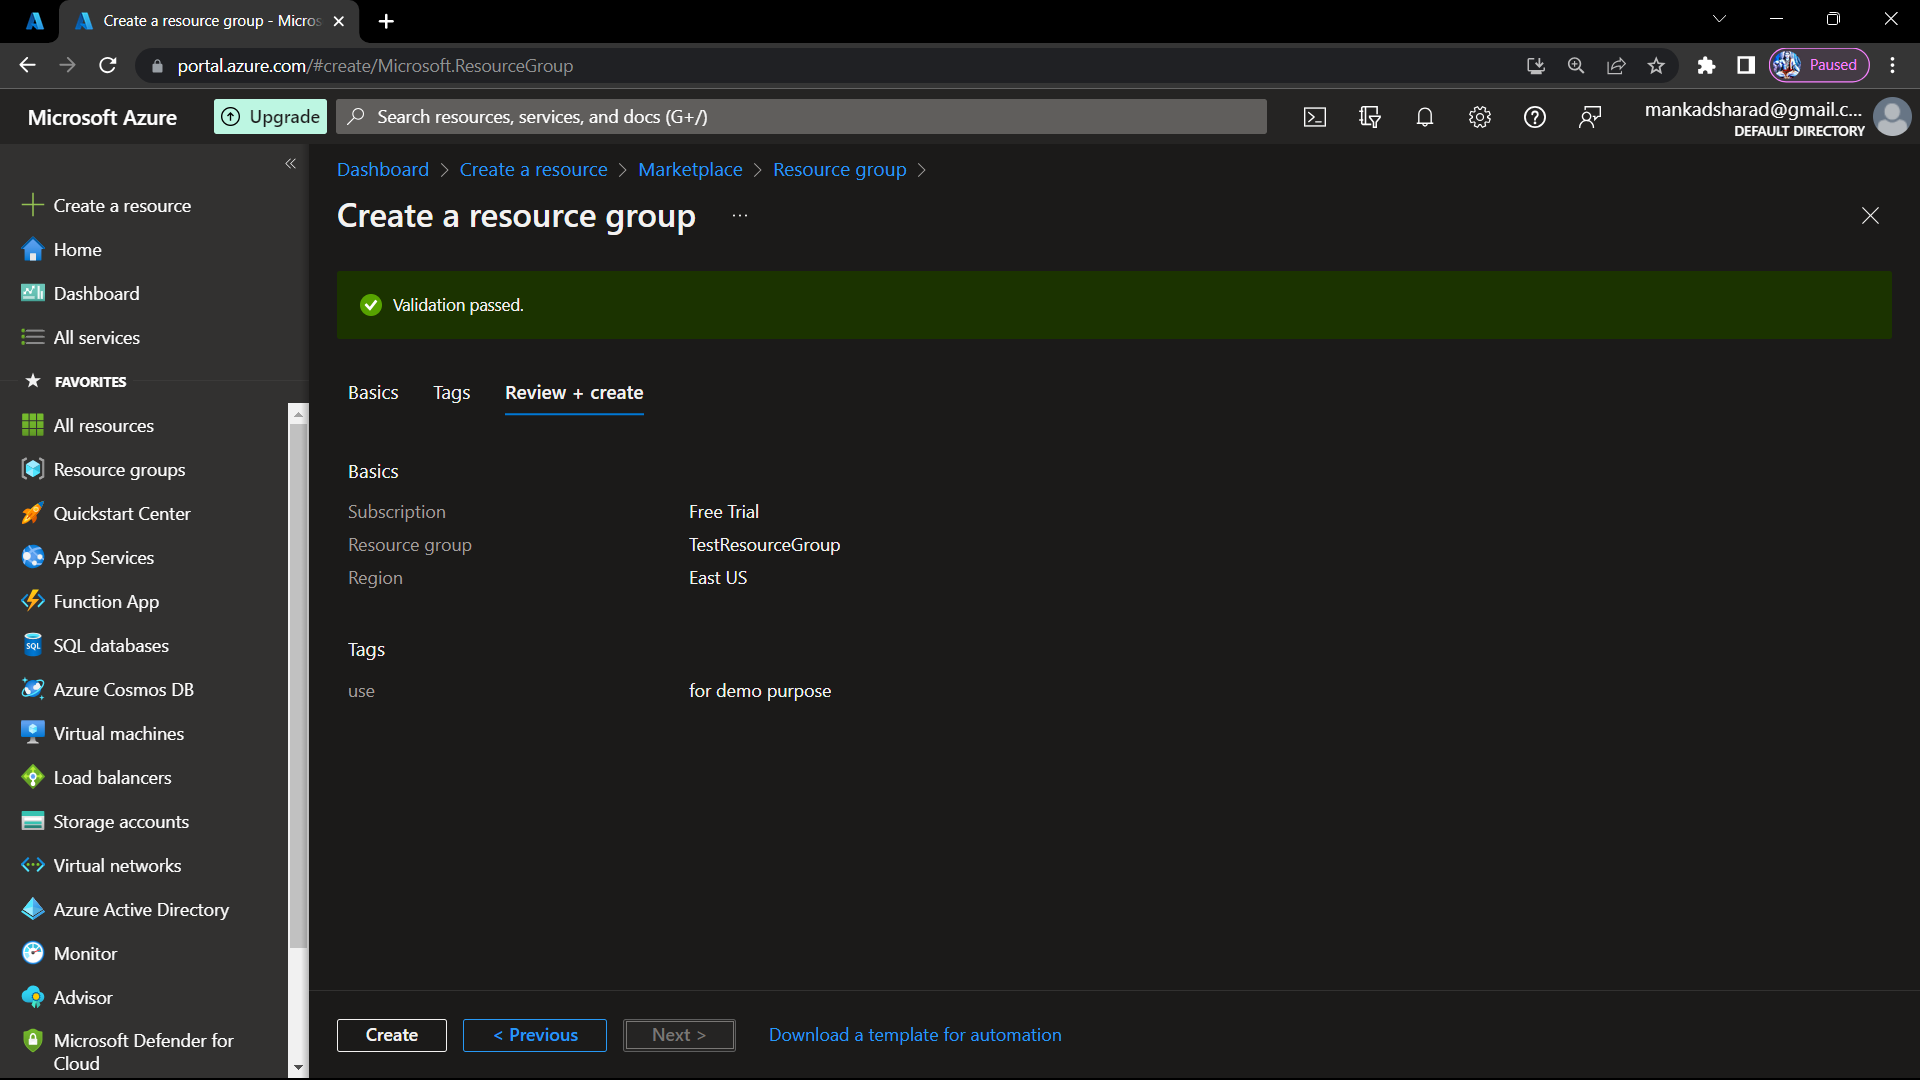
Step-7 Now our Resource Group is created and in dashboard of Resource Groups we can see our TestResourceGroup.

Create Virtual Network :
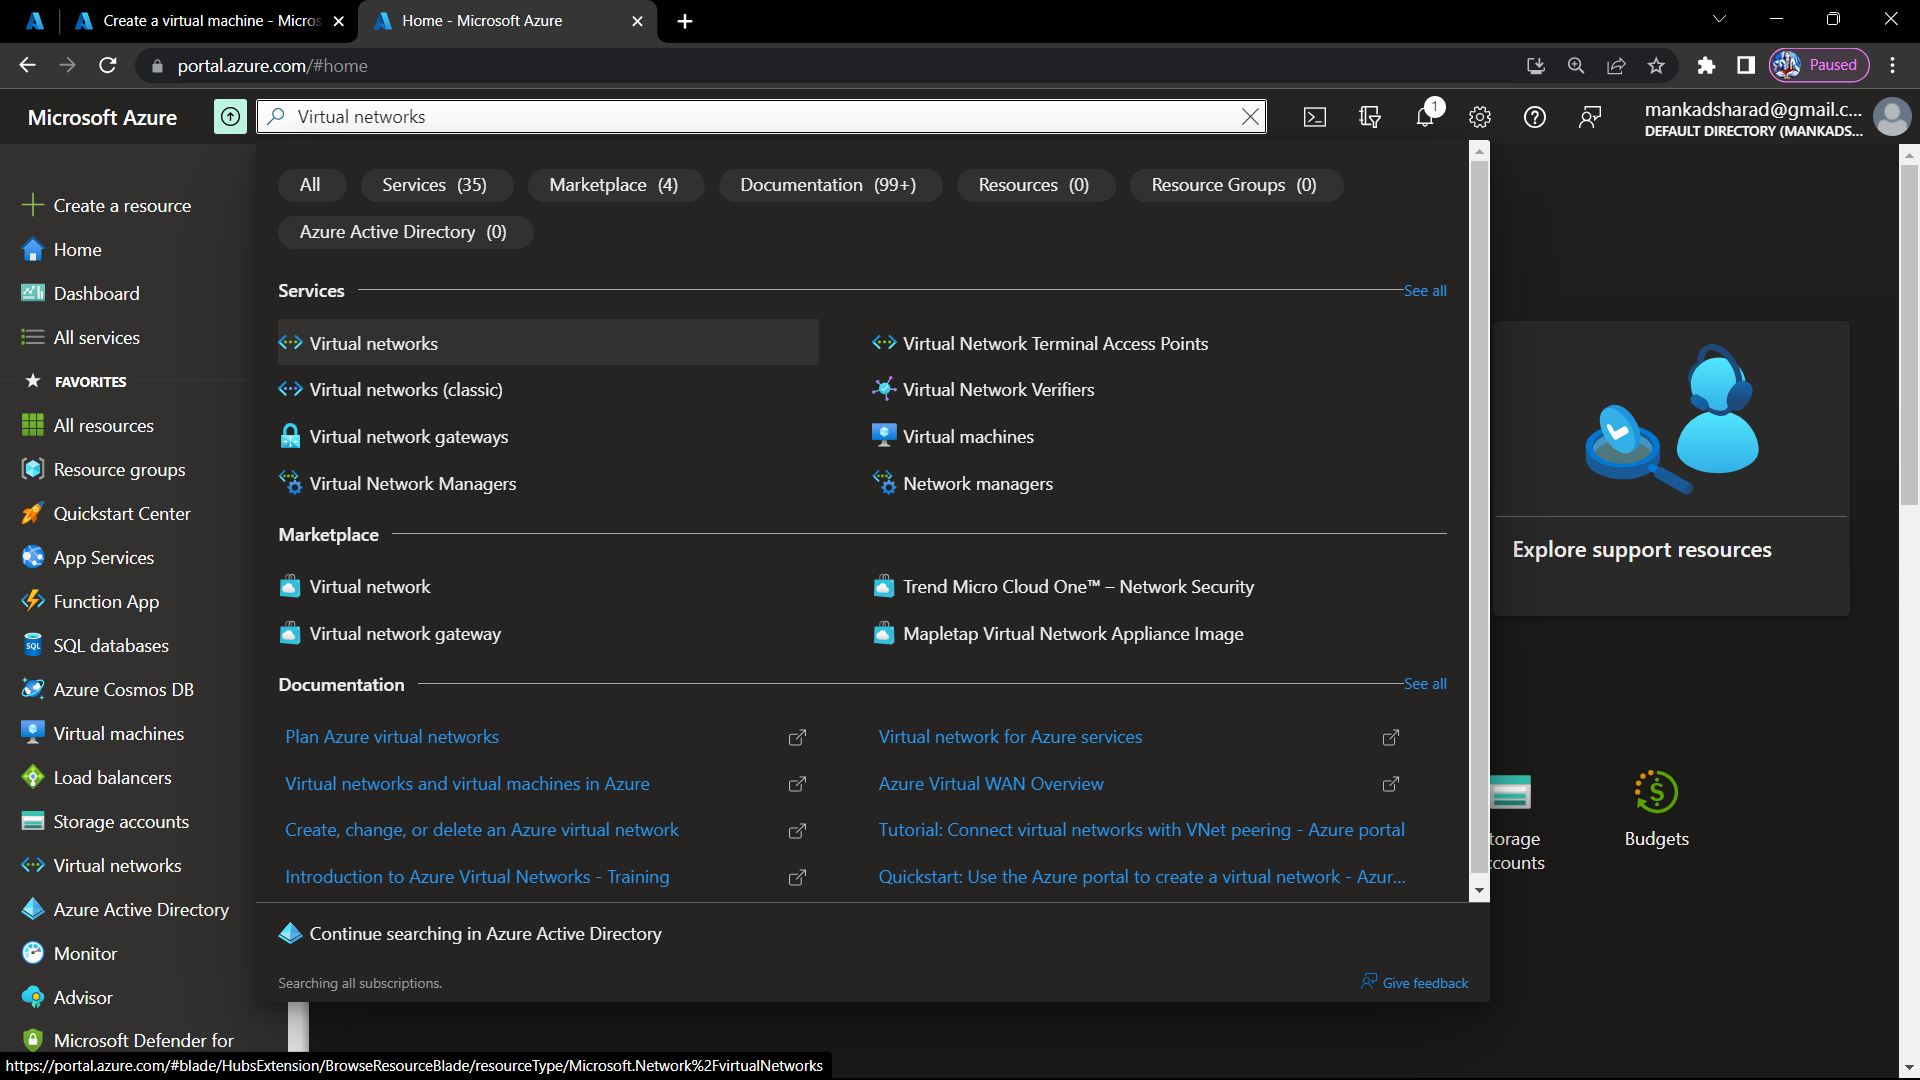
Step-8 Click on search bar and write Virtual Networks and click on virtual networks from results.
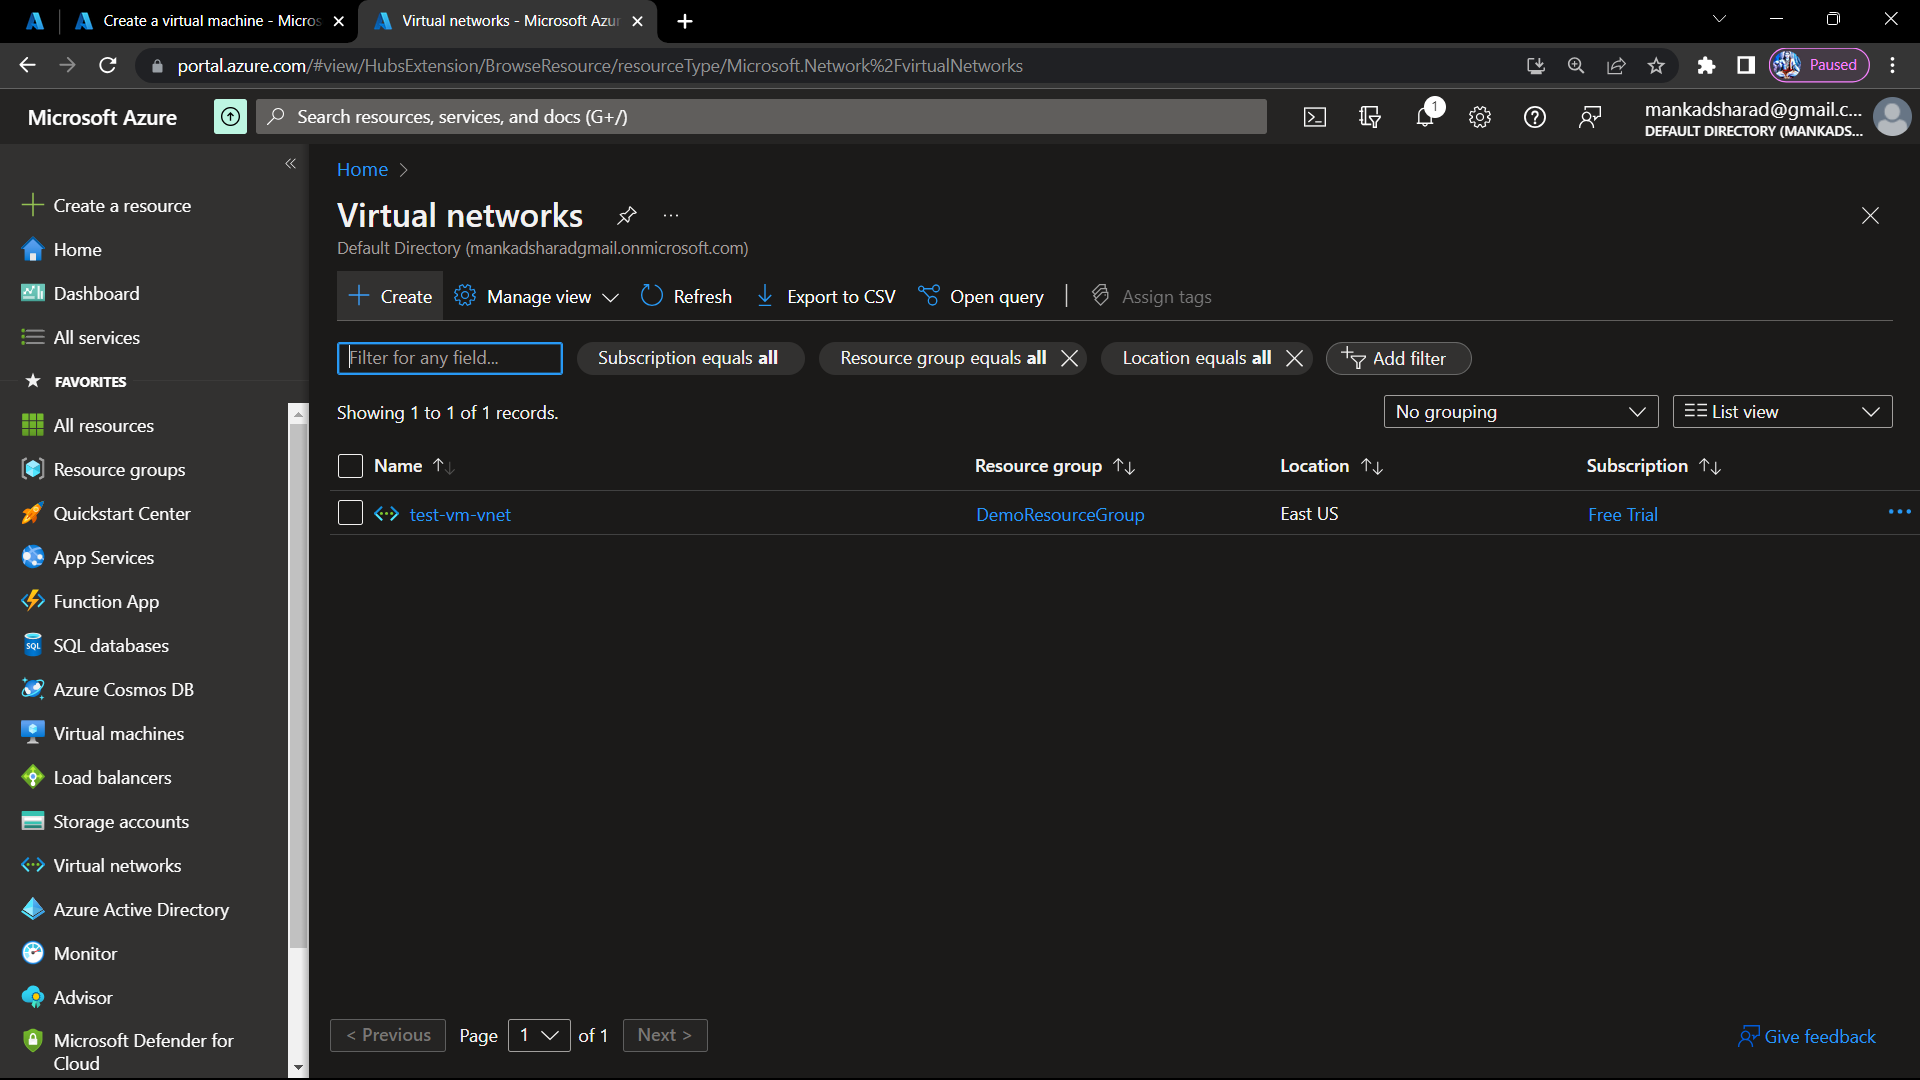
Step-9 Now on the virtual network dashboard click on create.
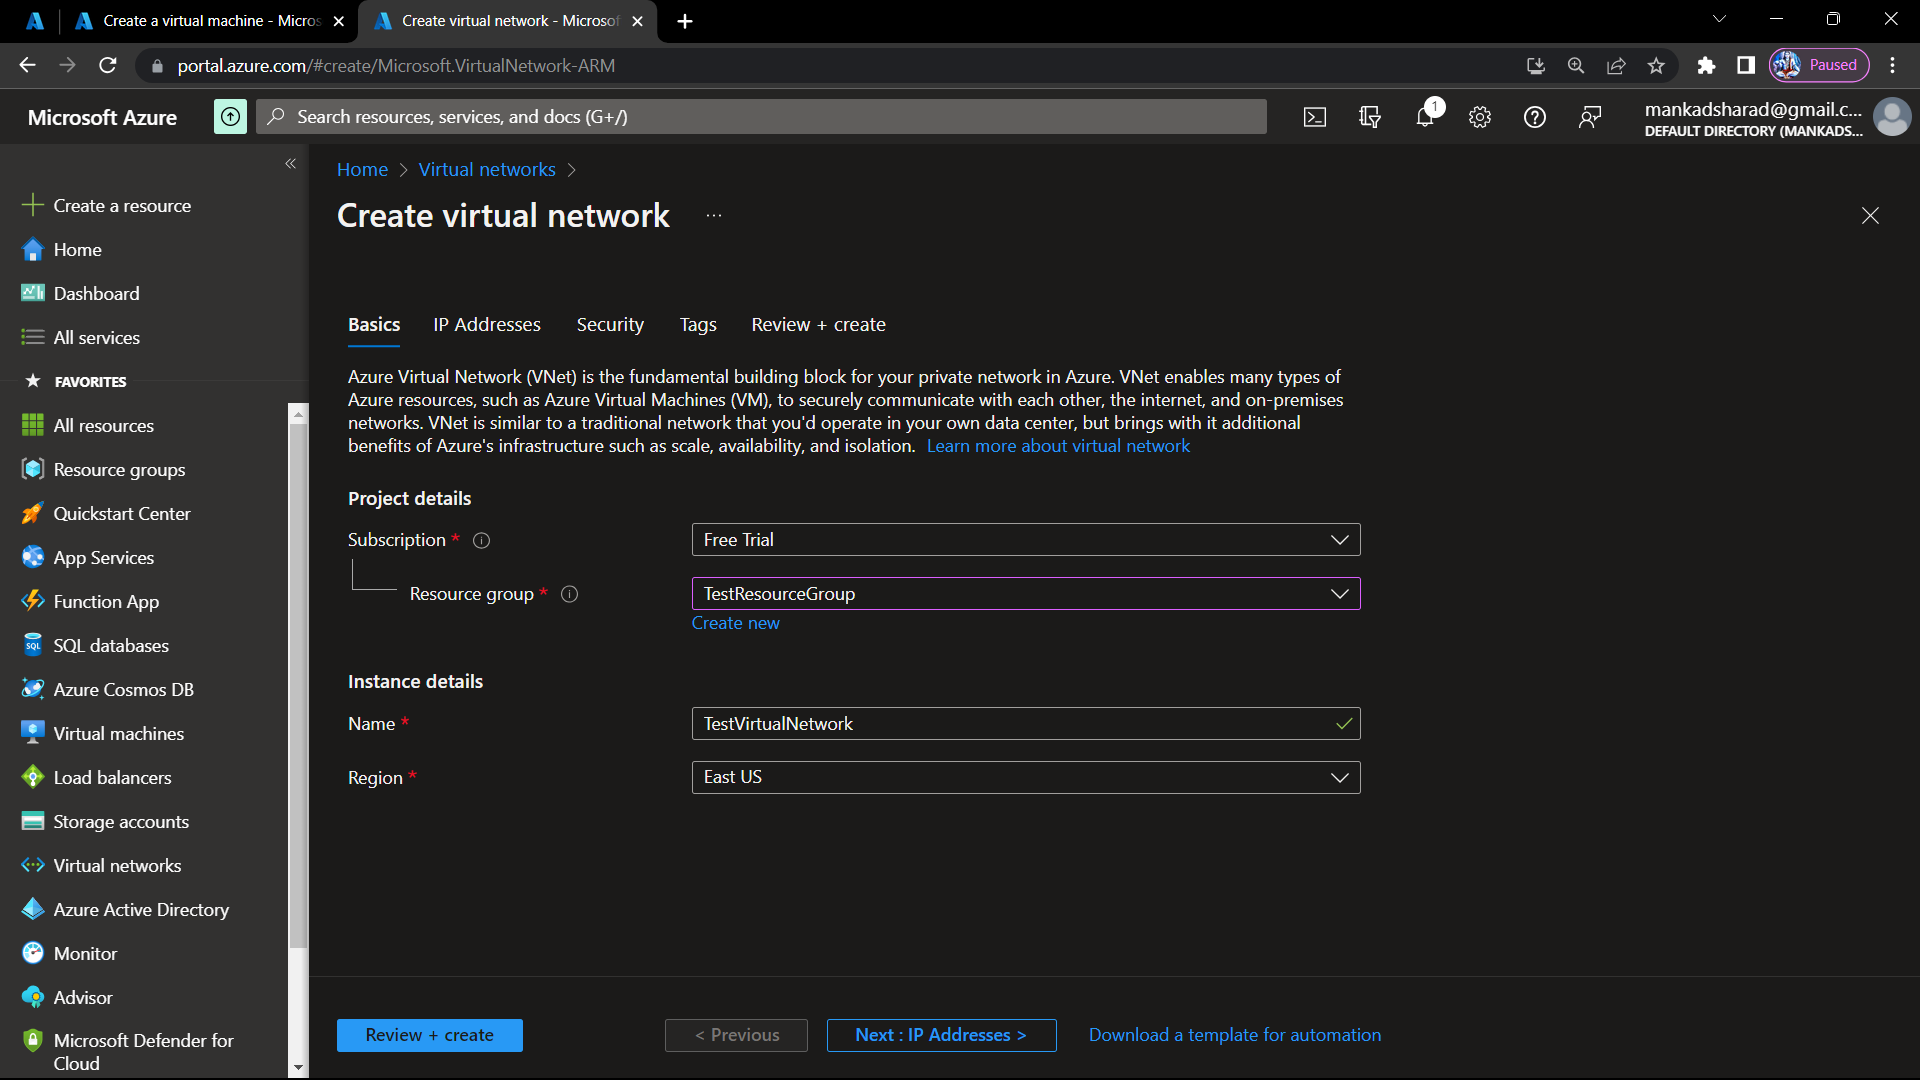
Step-10 Enter the basic details of virtual network. (subscription, name, region) and select the resource group as TestResourceGroup.
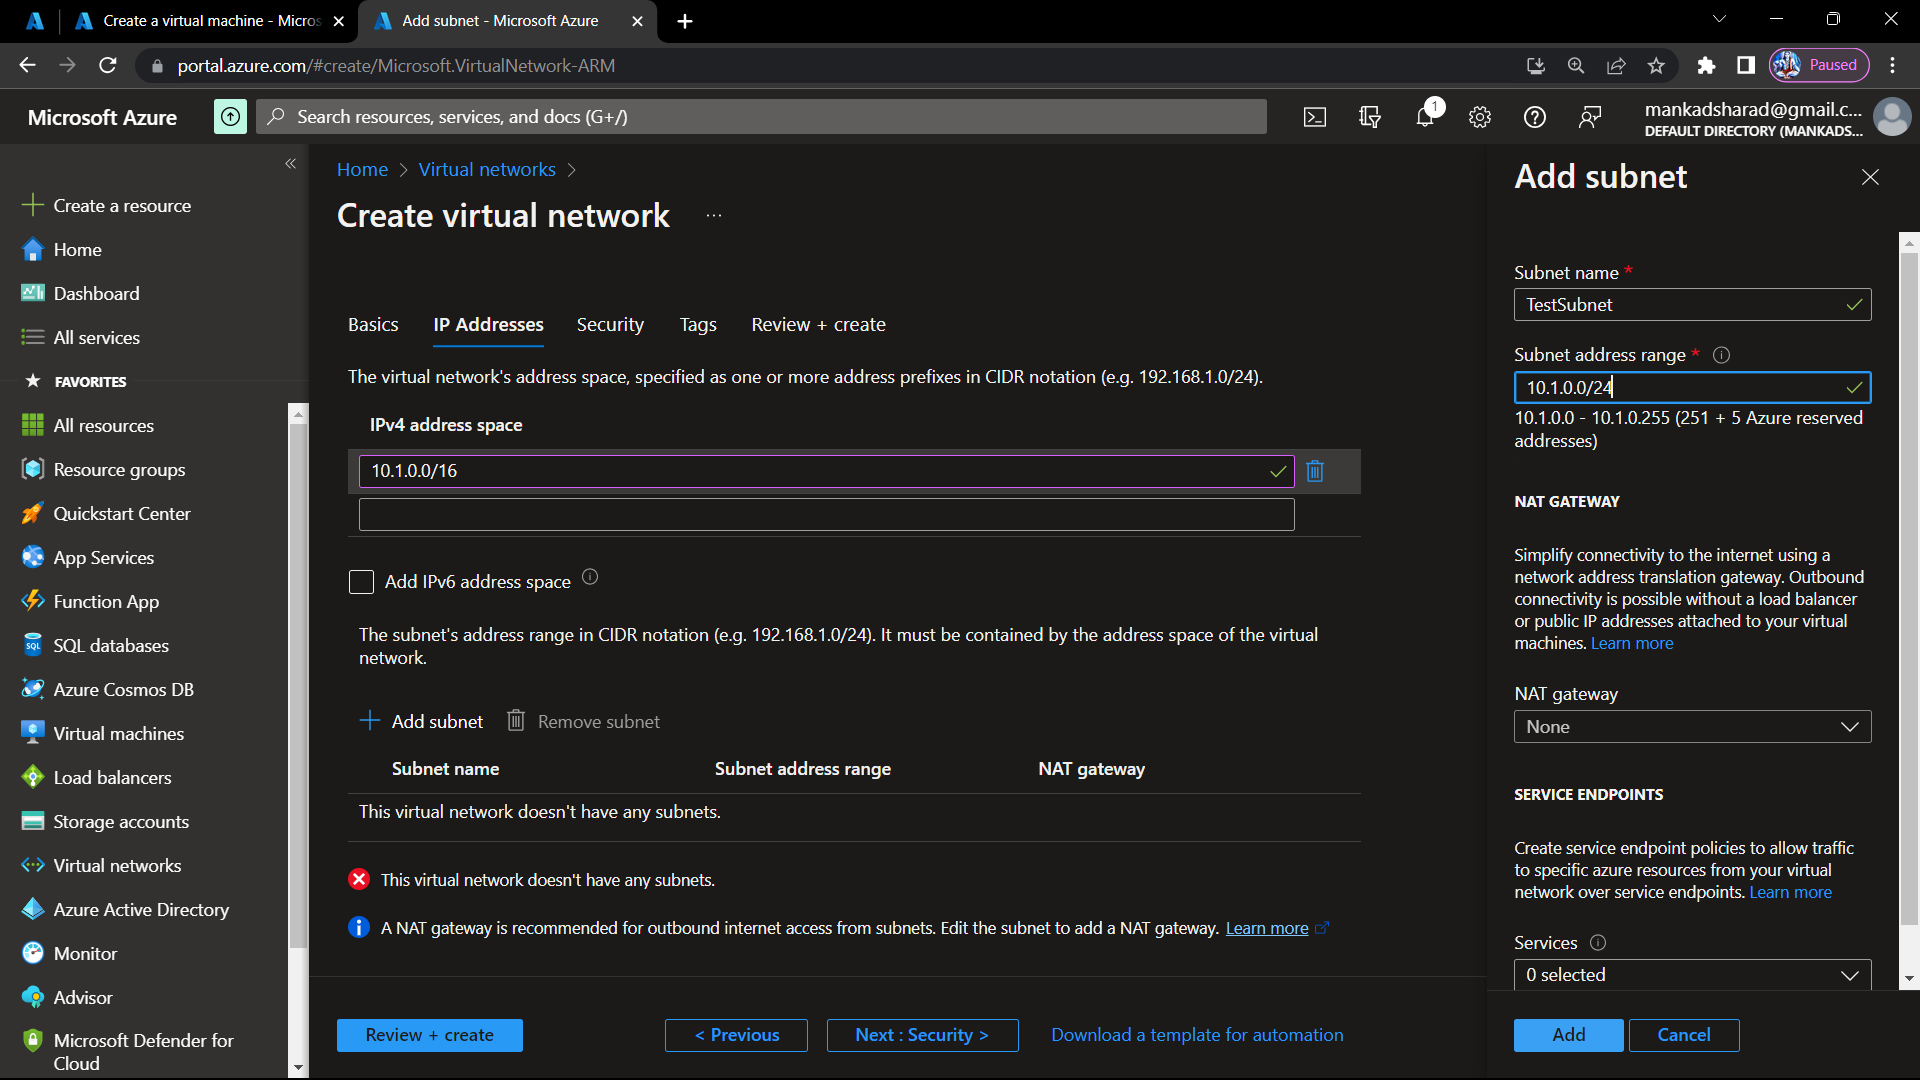
Step-11 On IP Addresses tab we can select default subnet but here we created a subnet named TestSubnet.
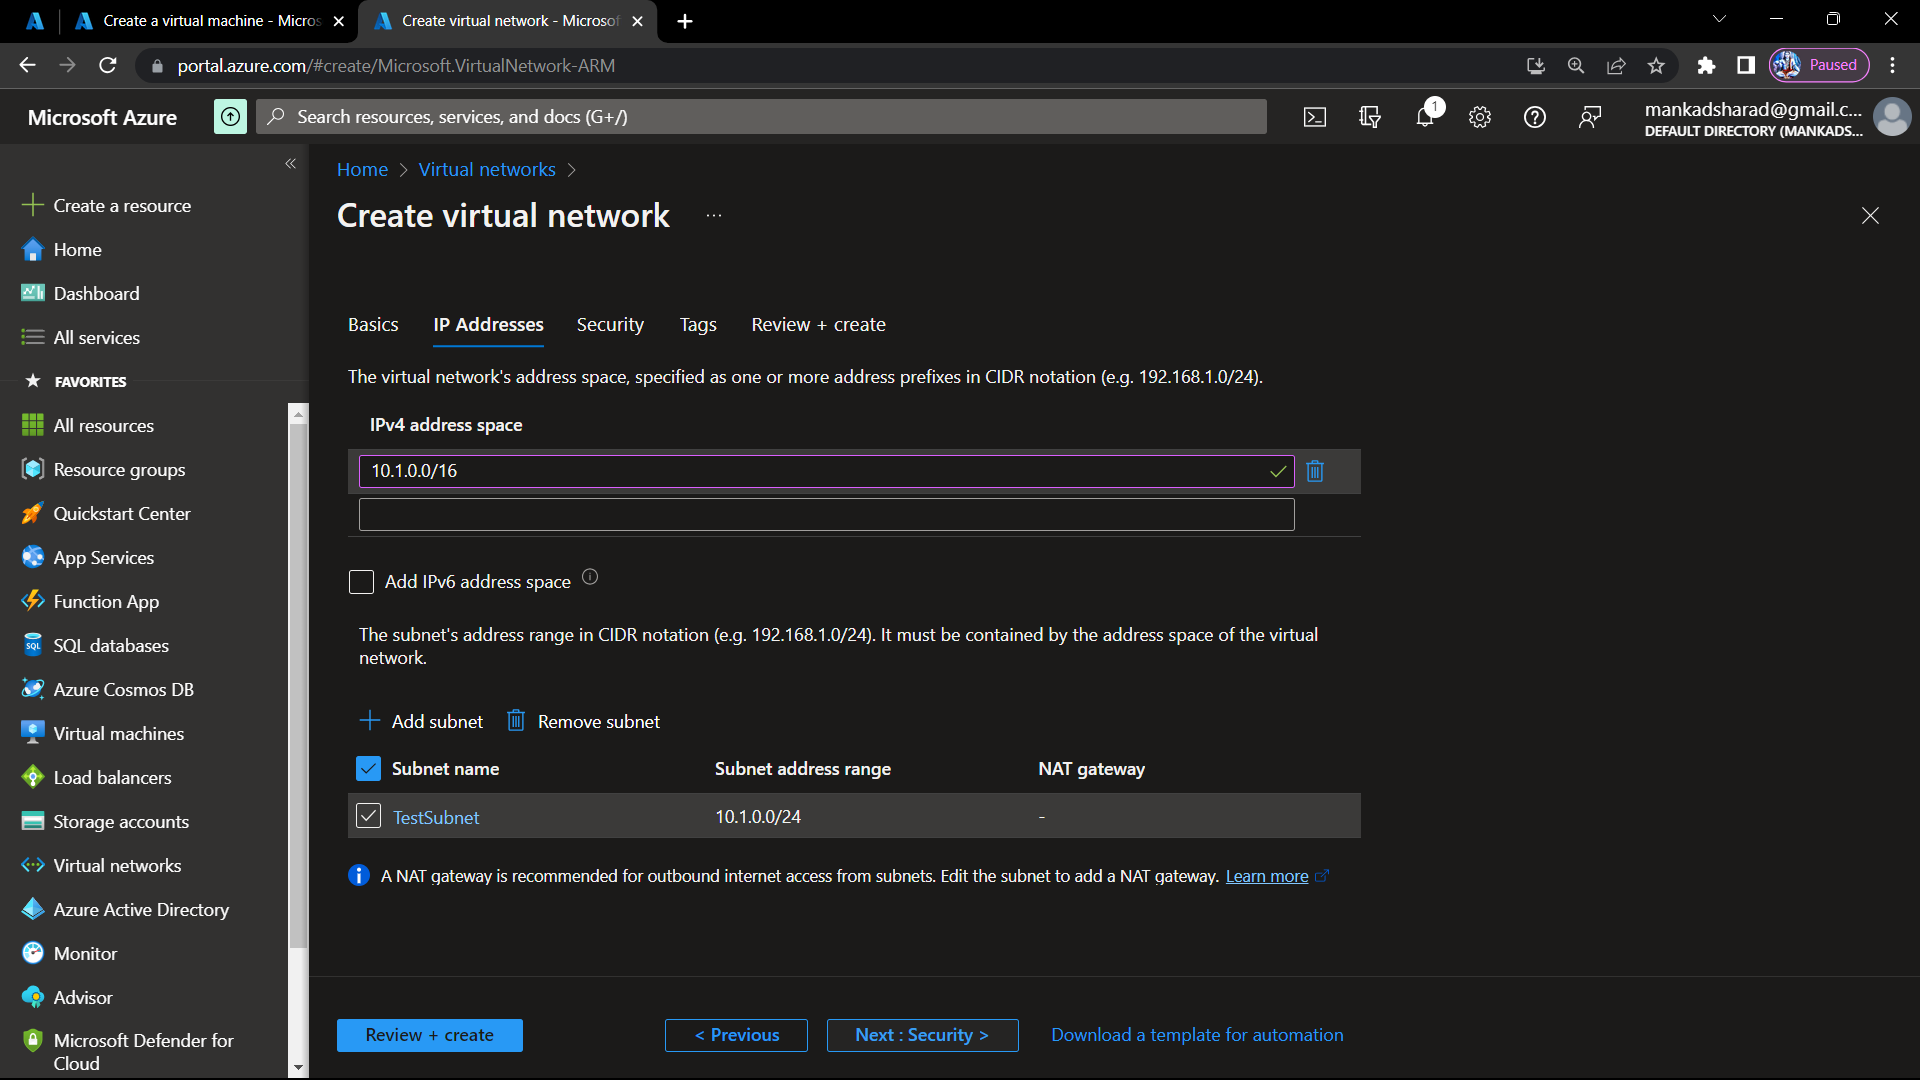
Step-12 Select the TestSubnet and click on next button.
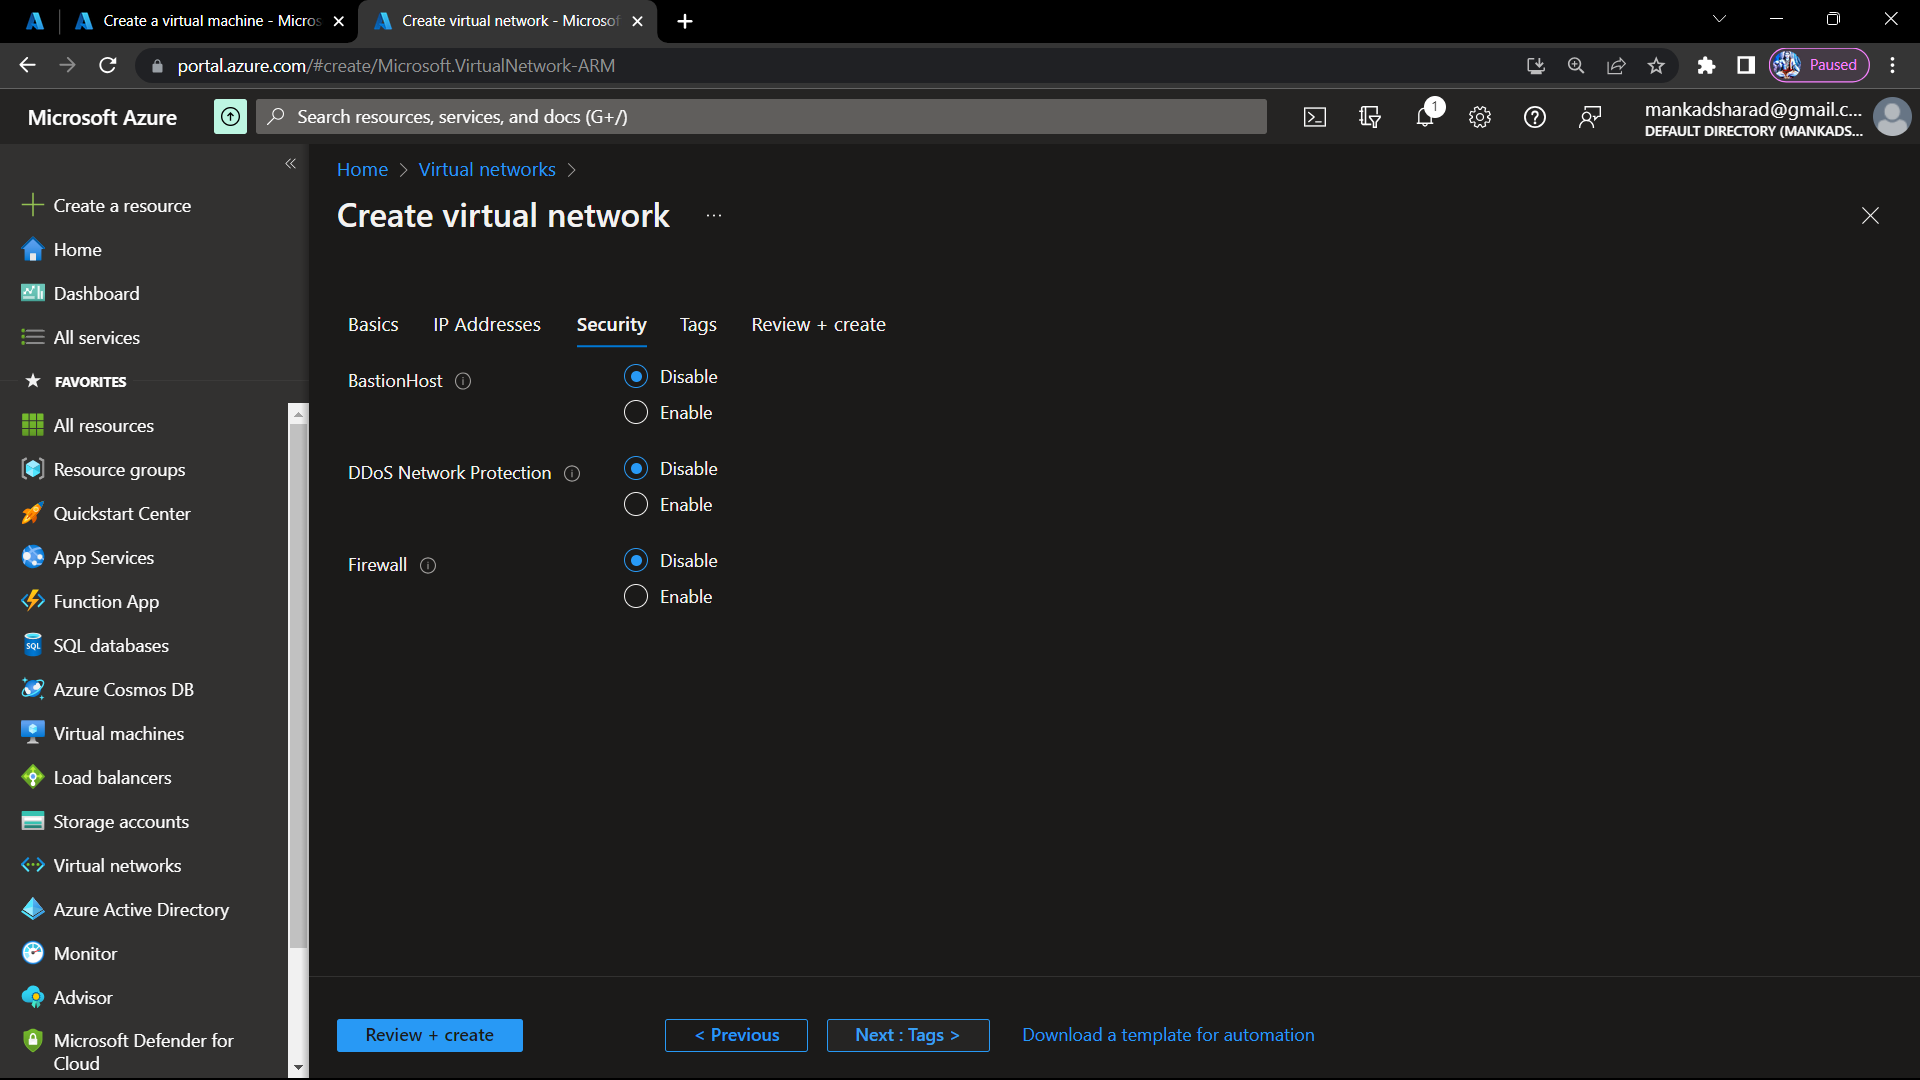
Step-13 On security tab we keep it as default.
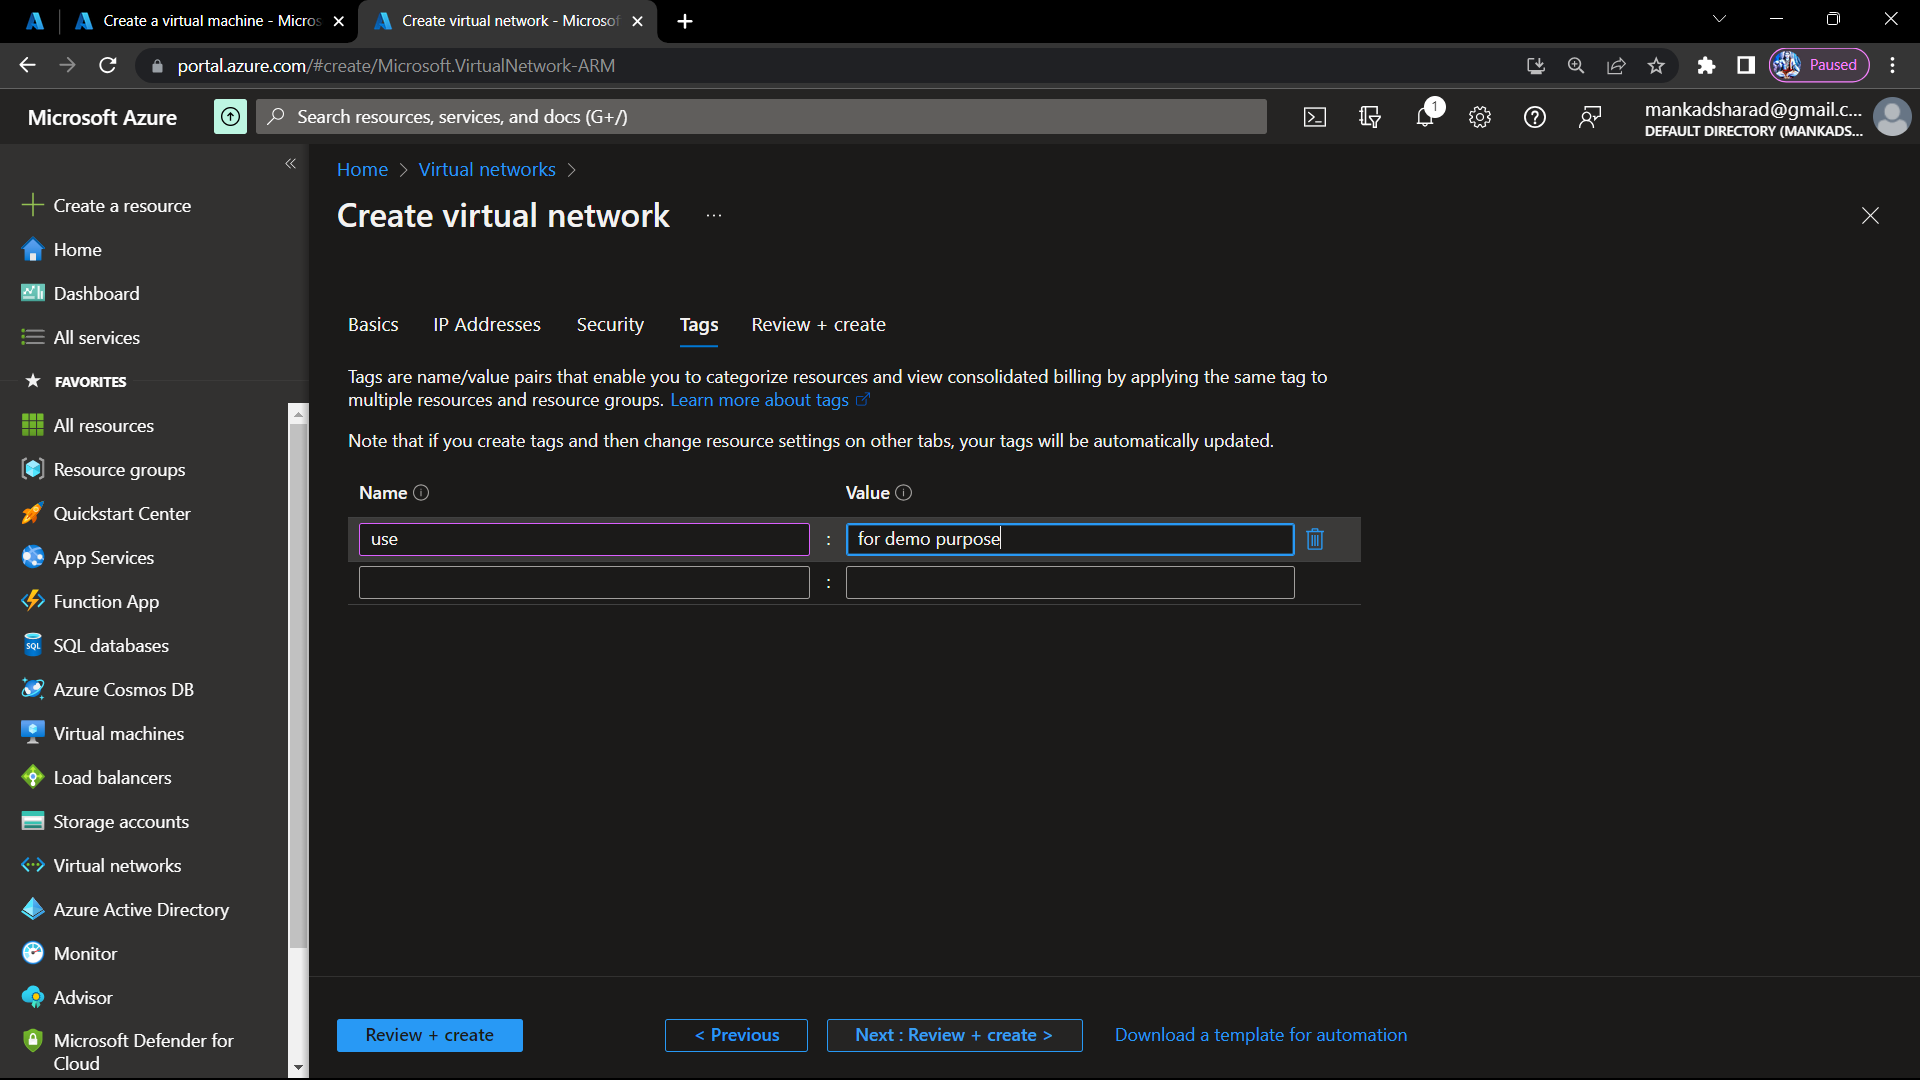
Step-14 Select the name-value keypair. and click on review and create.
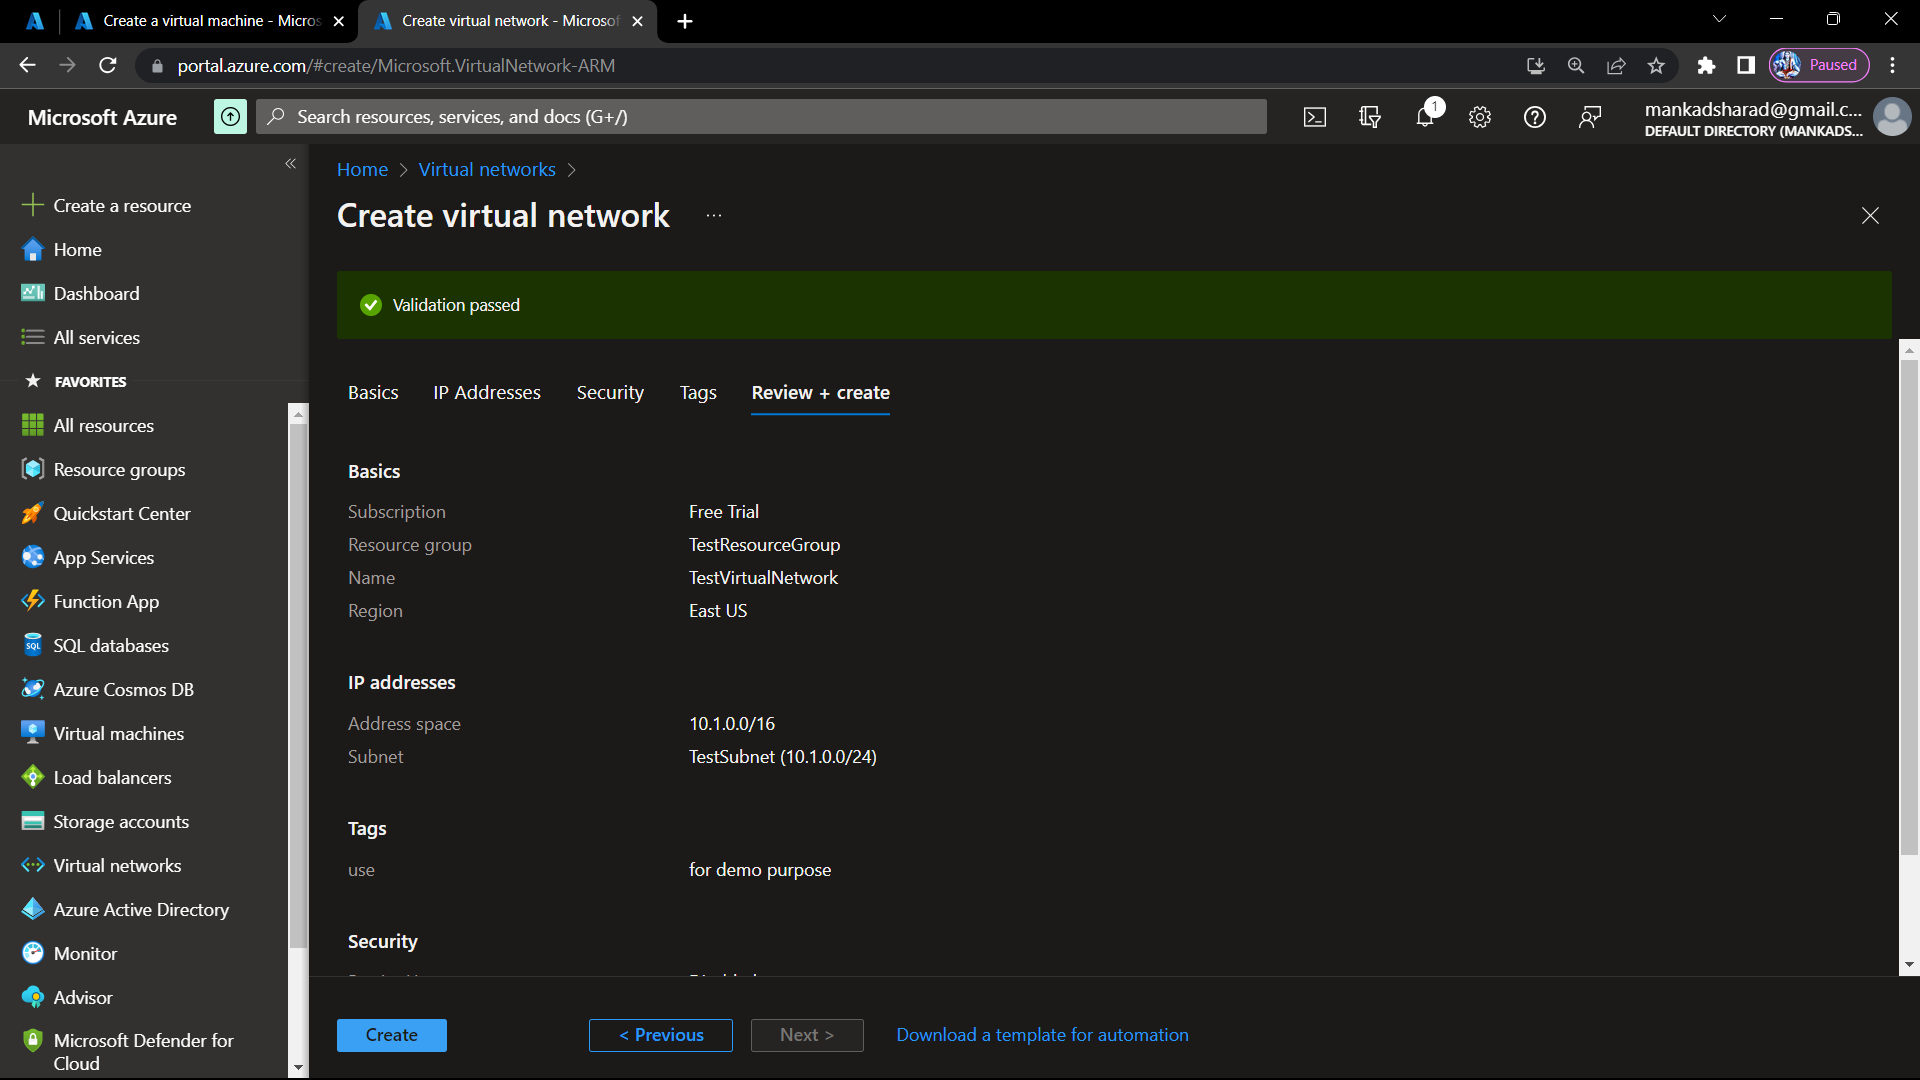
Step-15 review all the details of virtual network and click on create button.
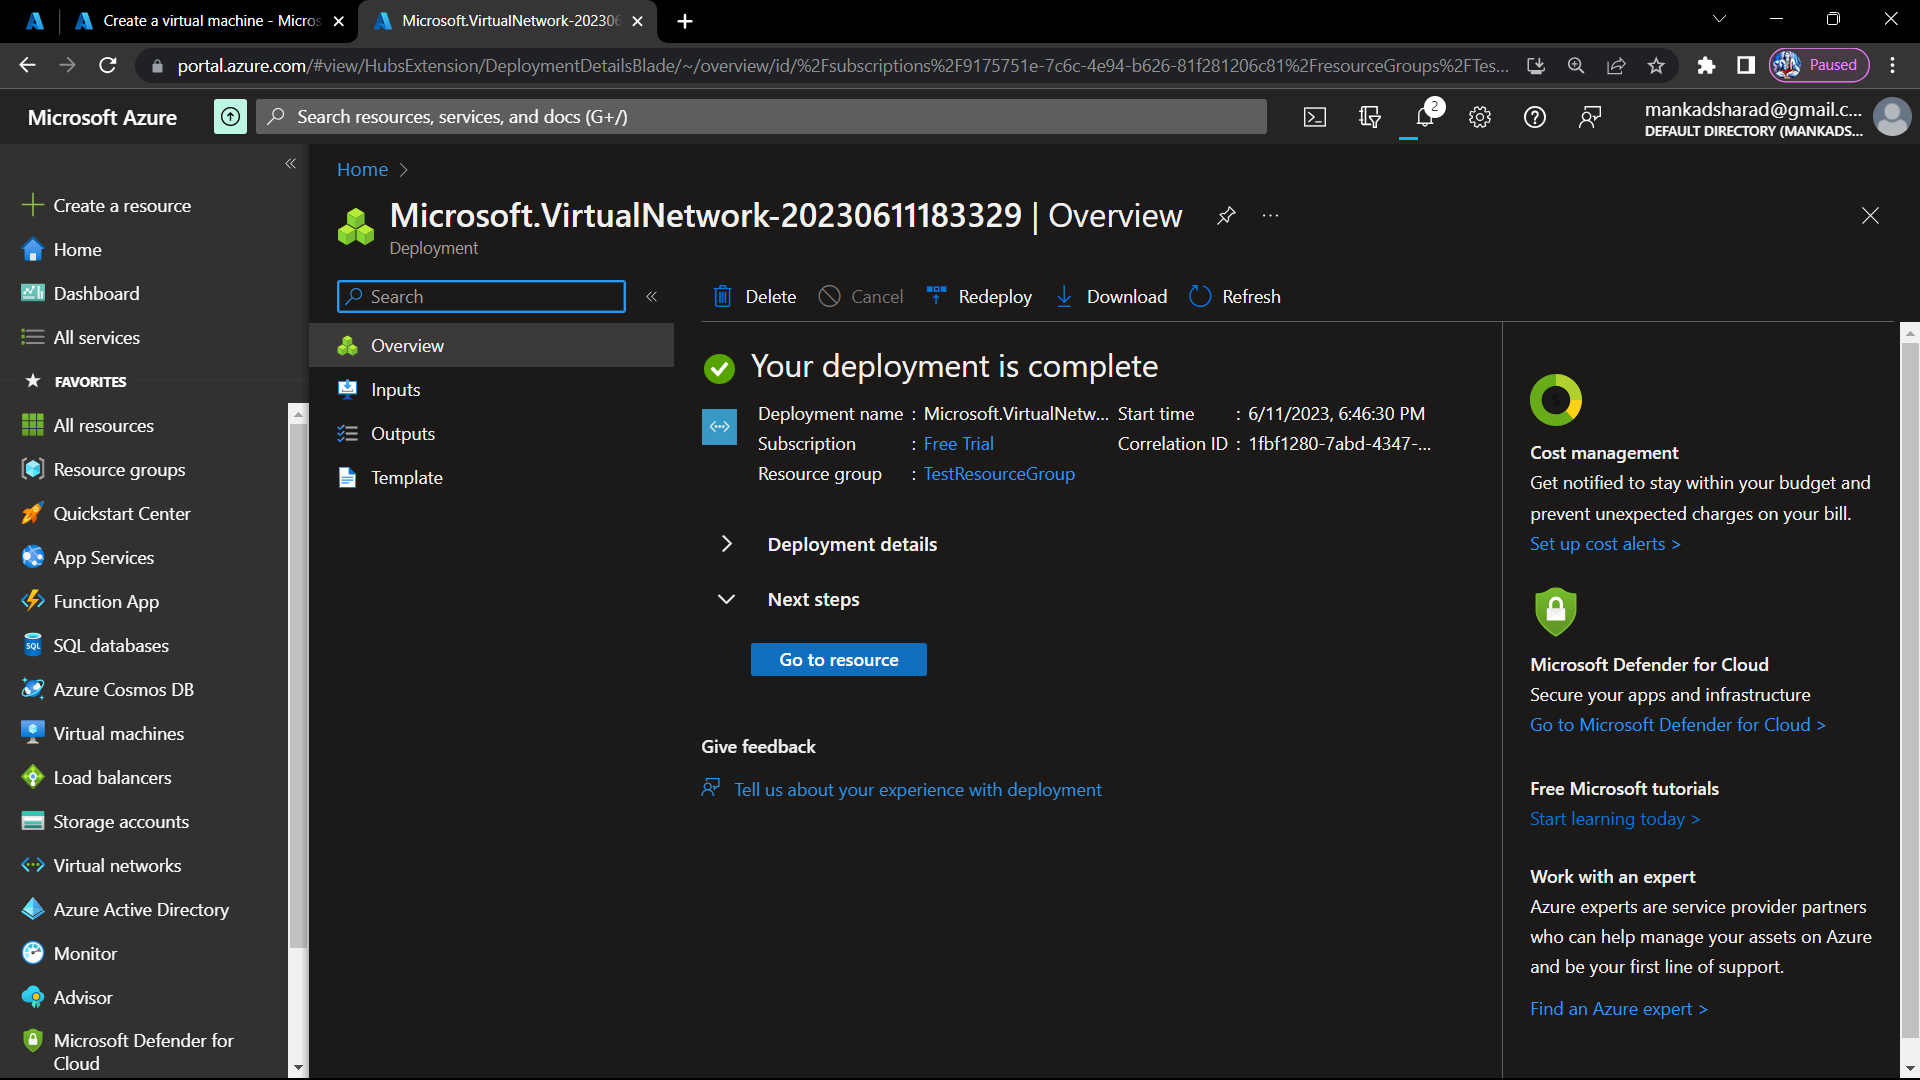
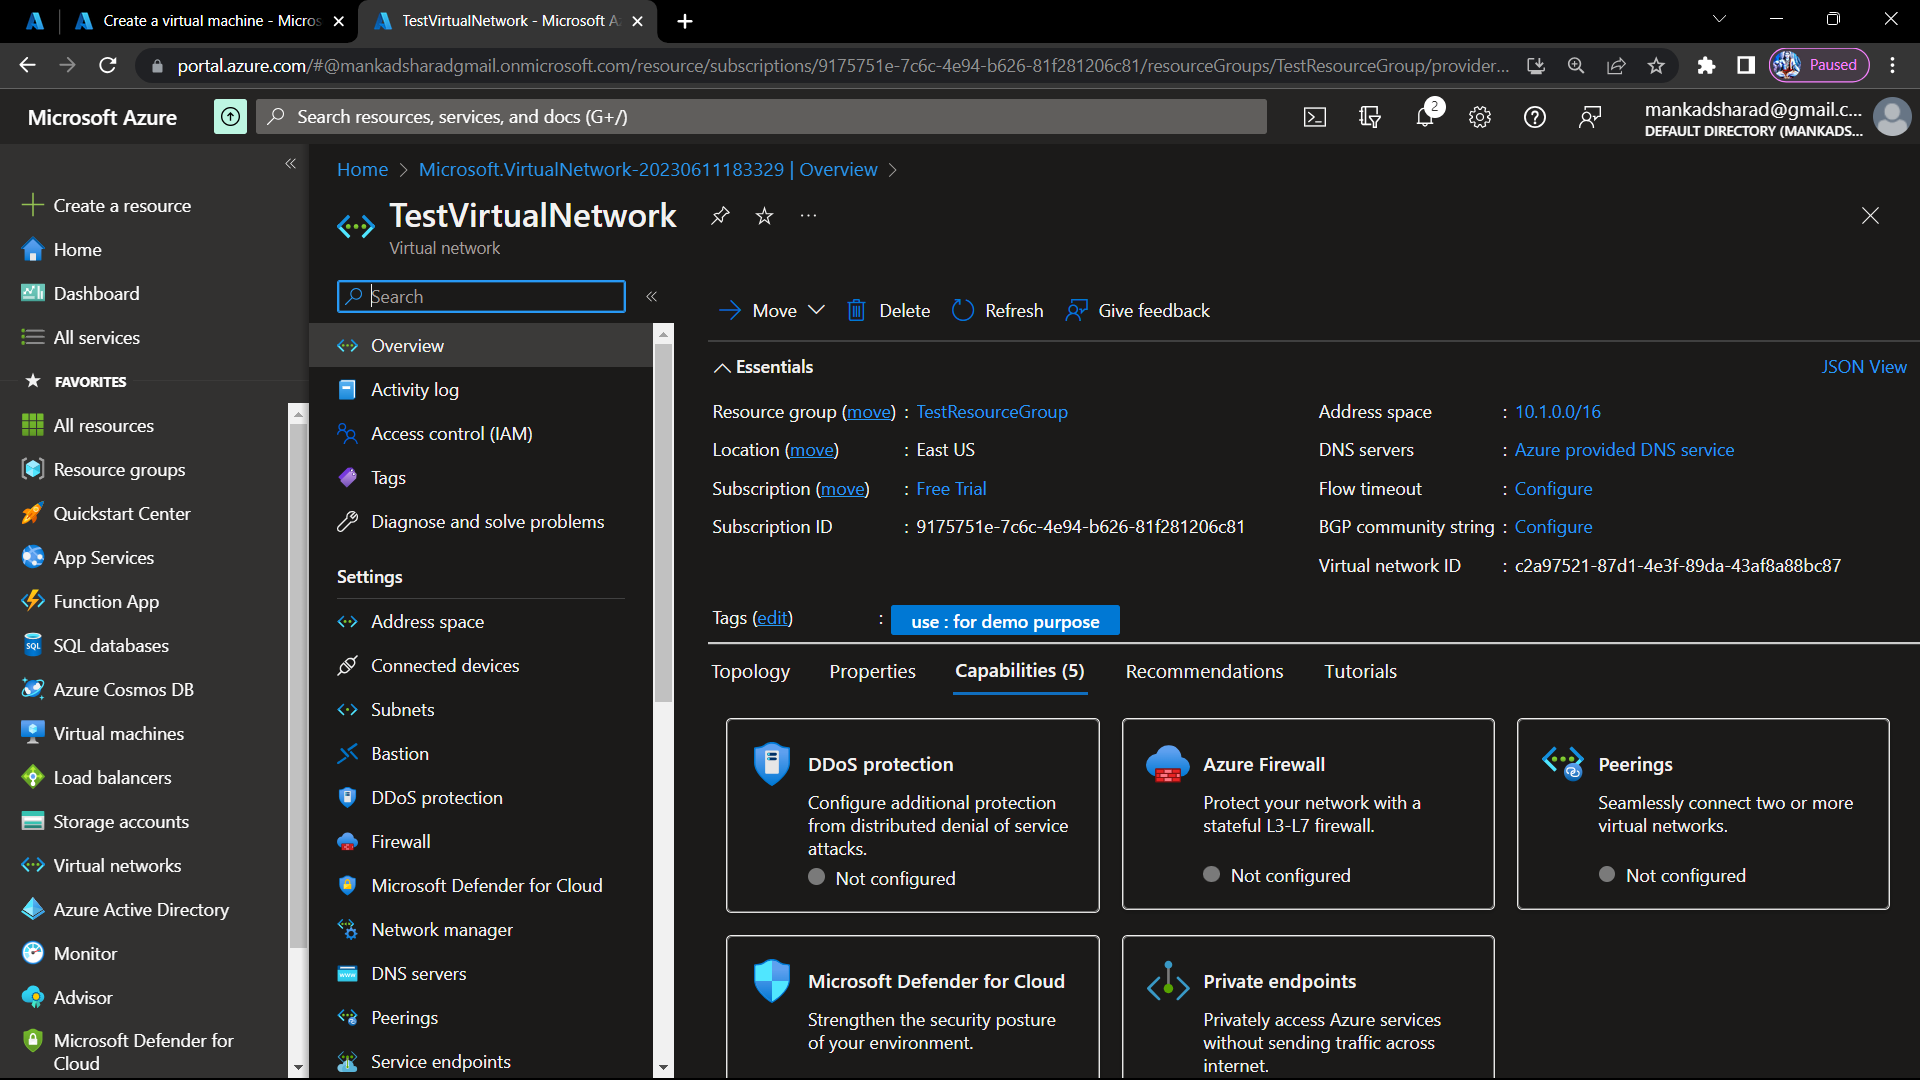
Step-16 Virtual Network is created. you can click on go to resource and can see all the details of Virtual Network.
Create Virtual Machine :
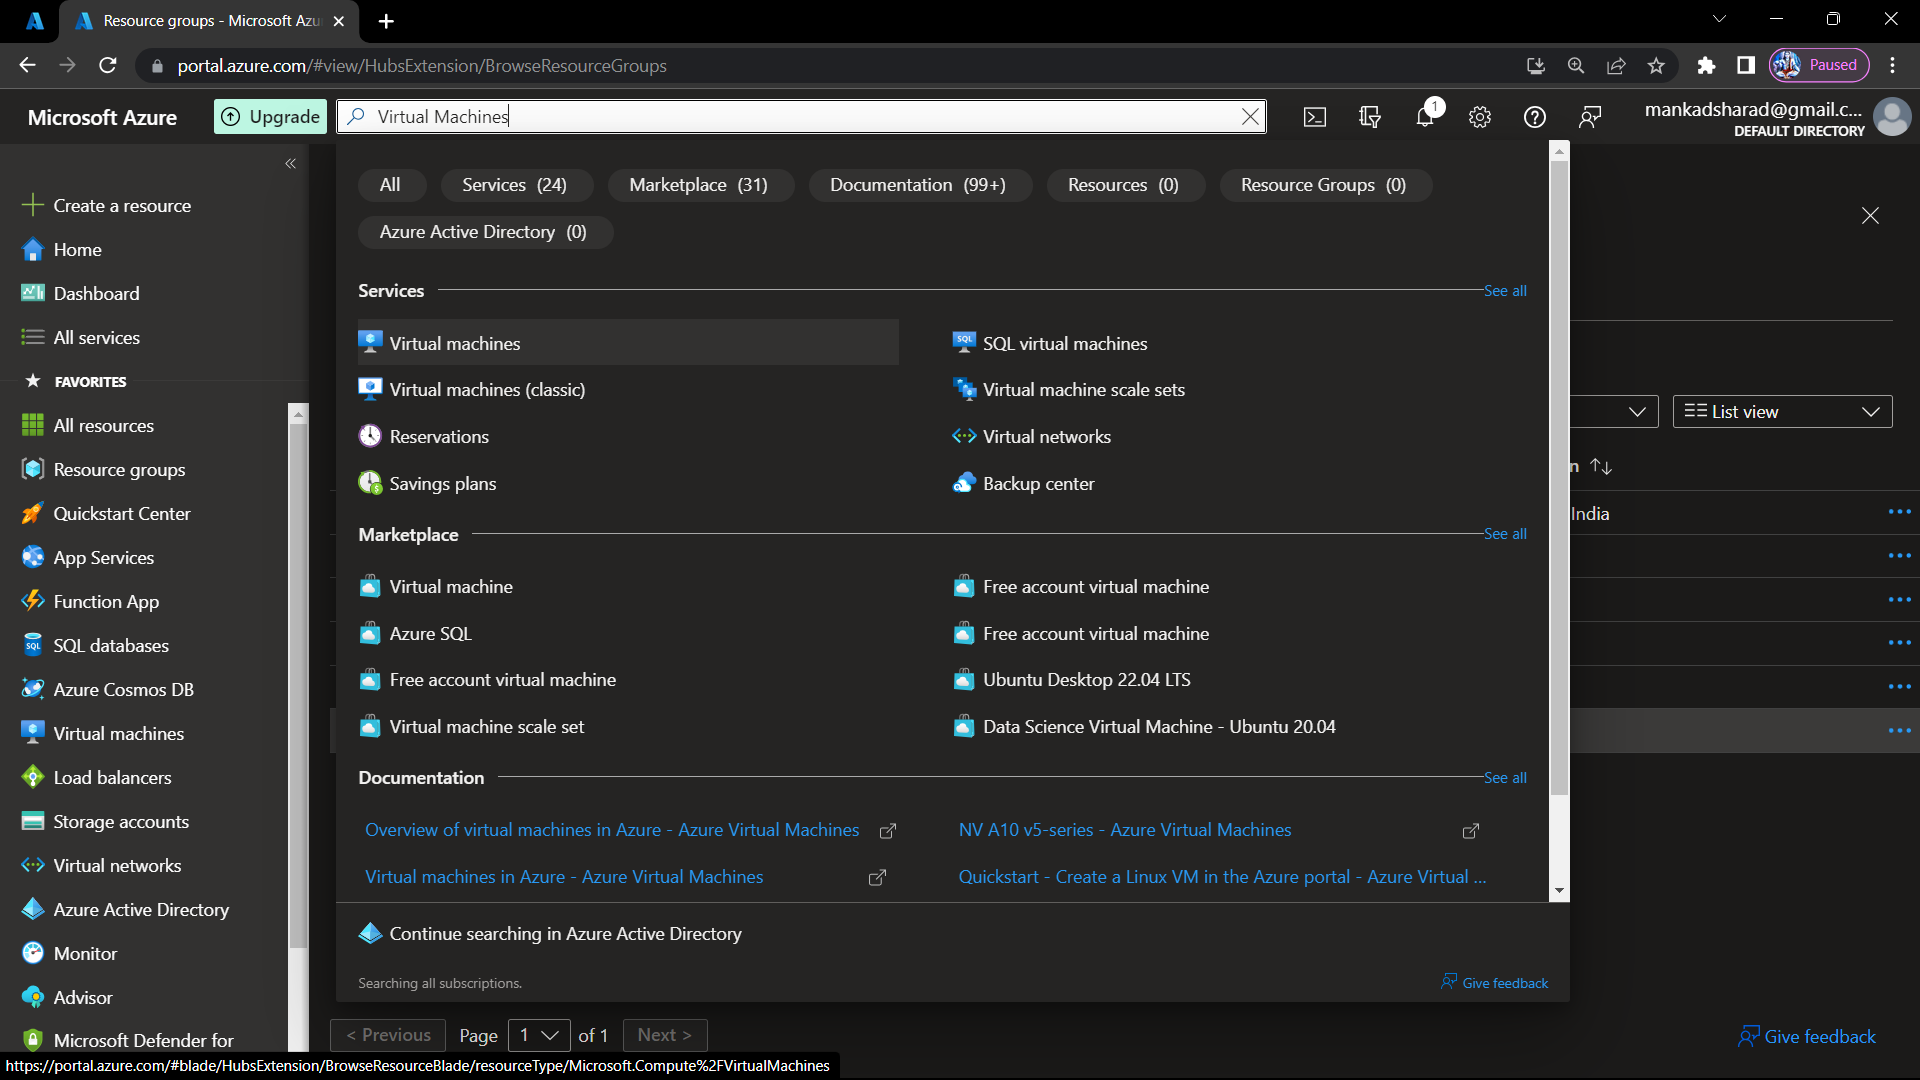
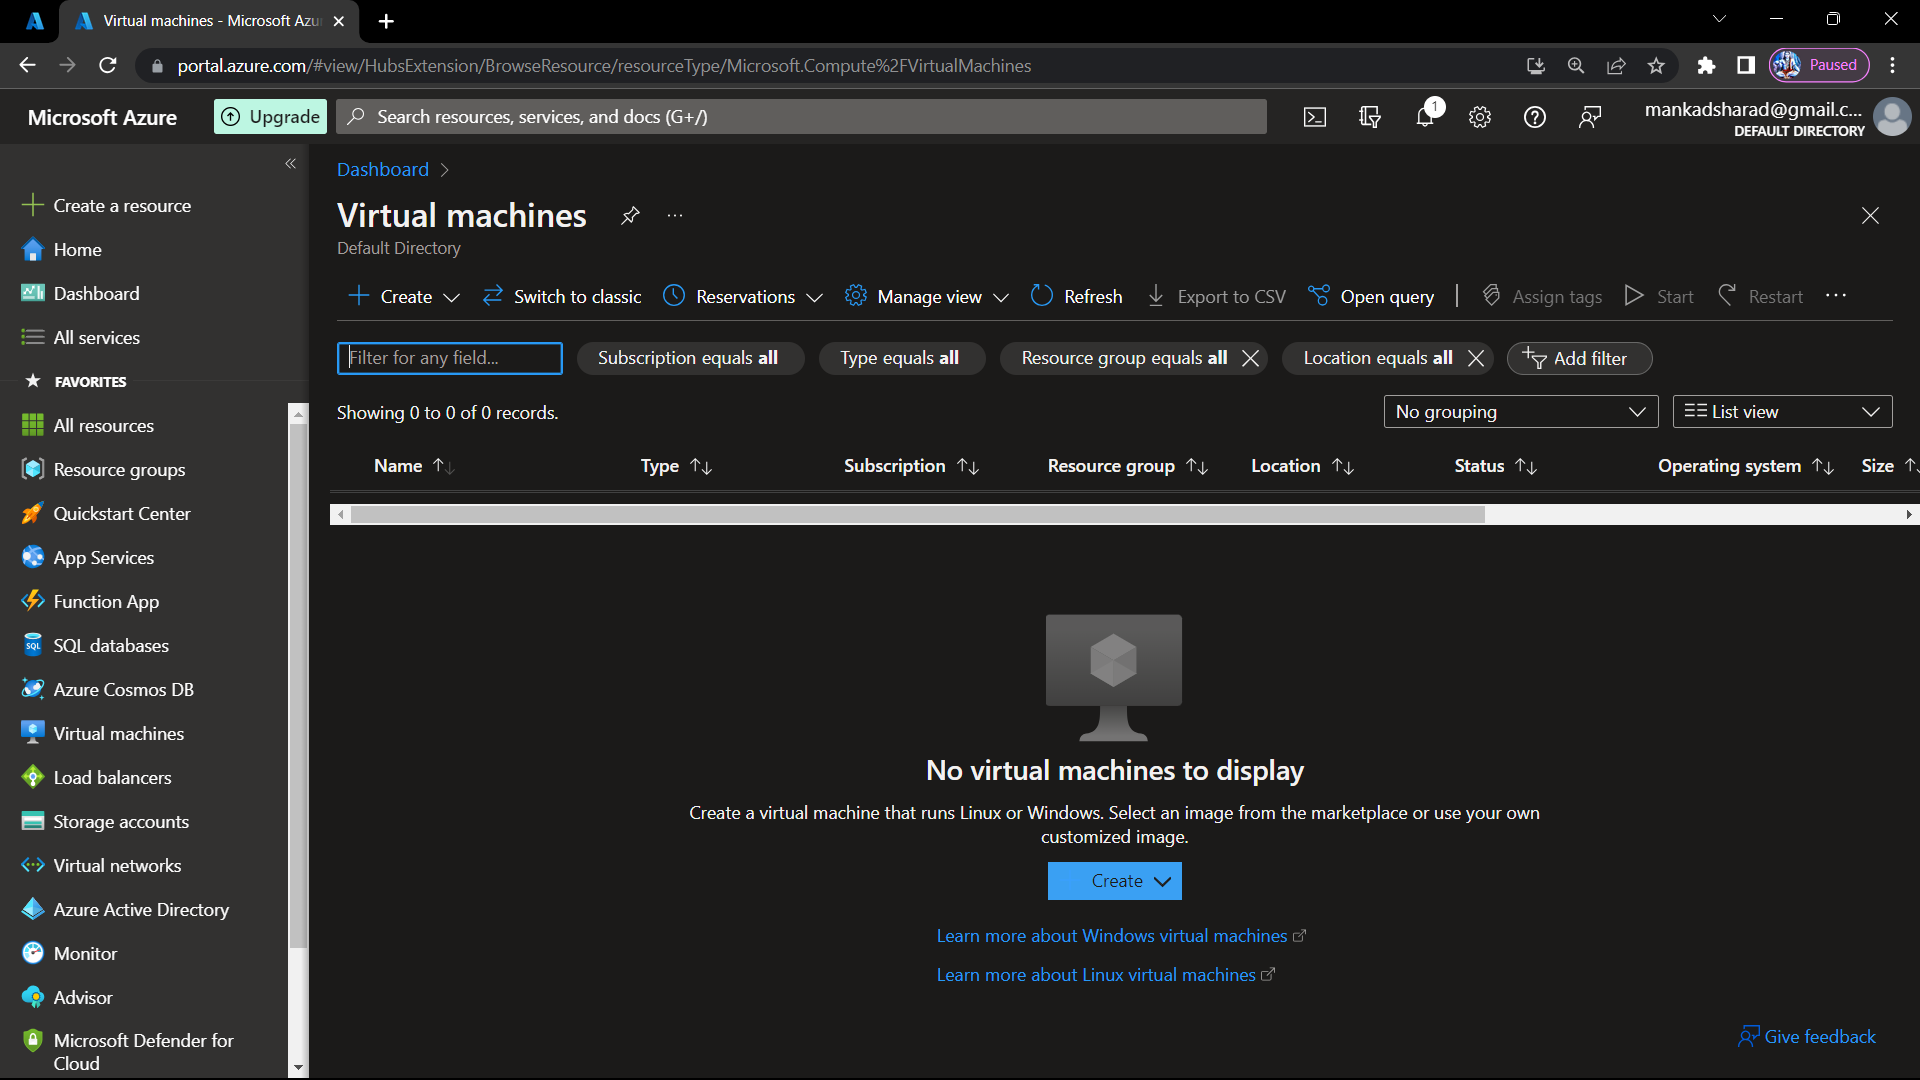
Step-17 Now we click on search bar and type virtual machines. Click on virtual machines from results.
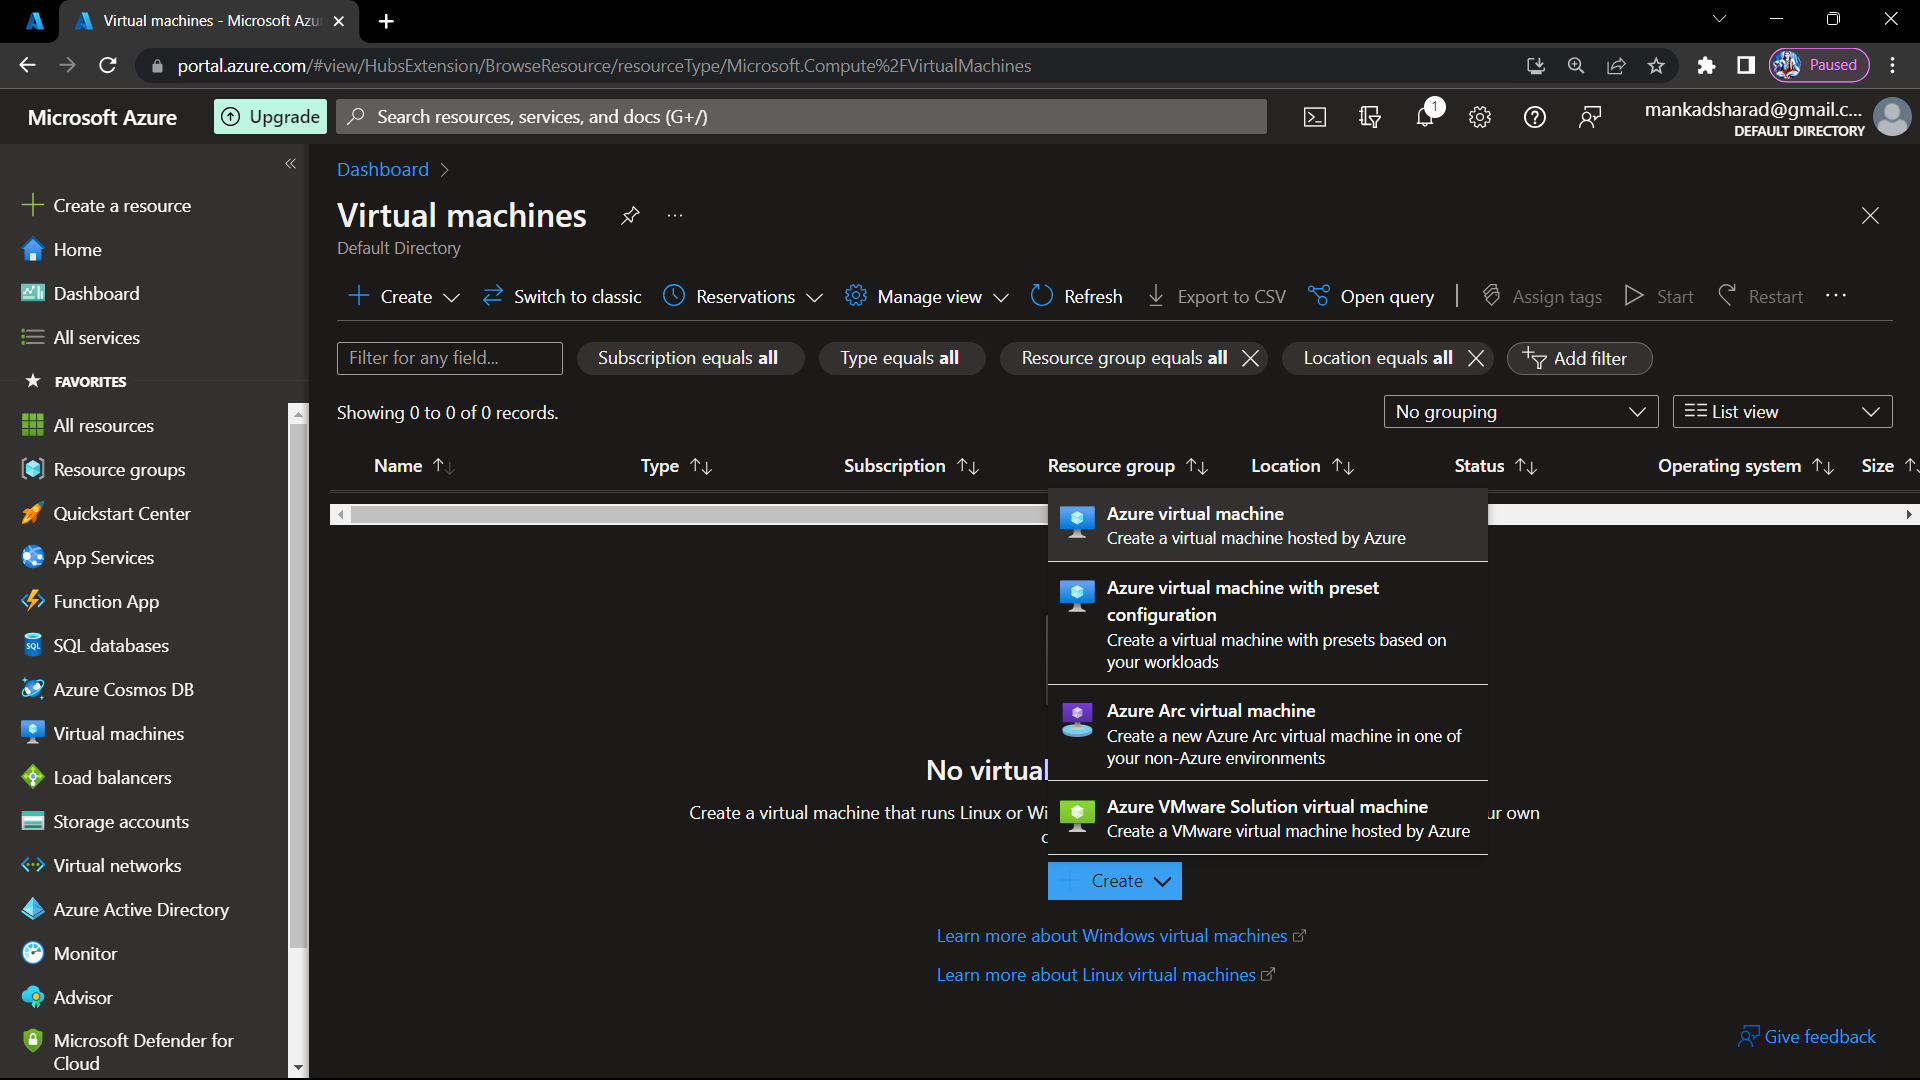
Step-18 On dashboard of virtual machine, click on Create button.
Step-19 Select the Azure Virtual Machine option.
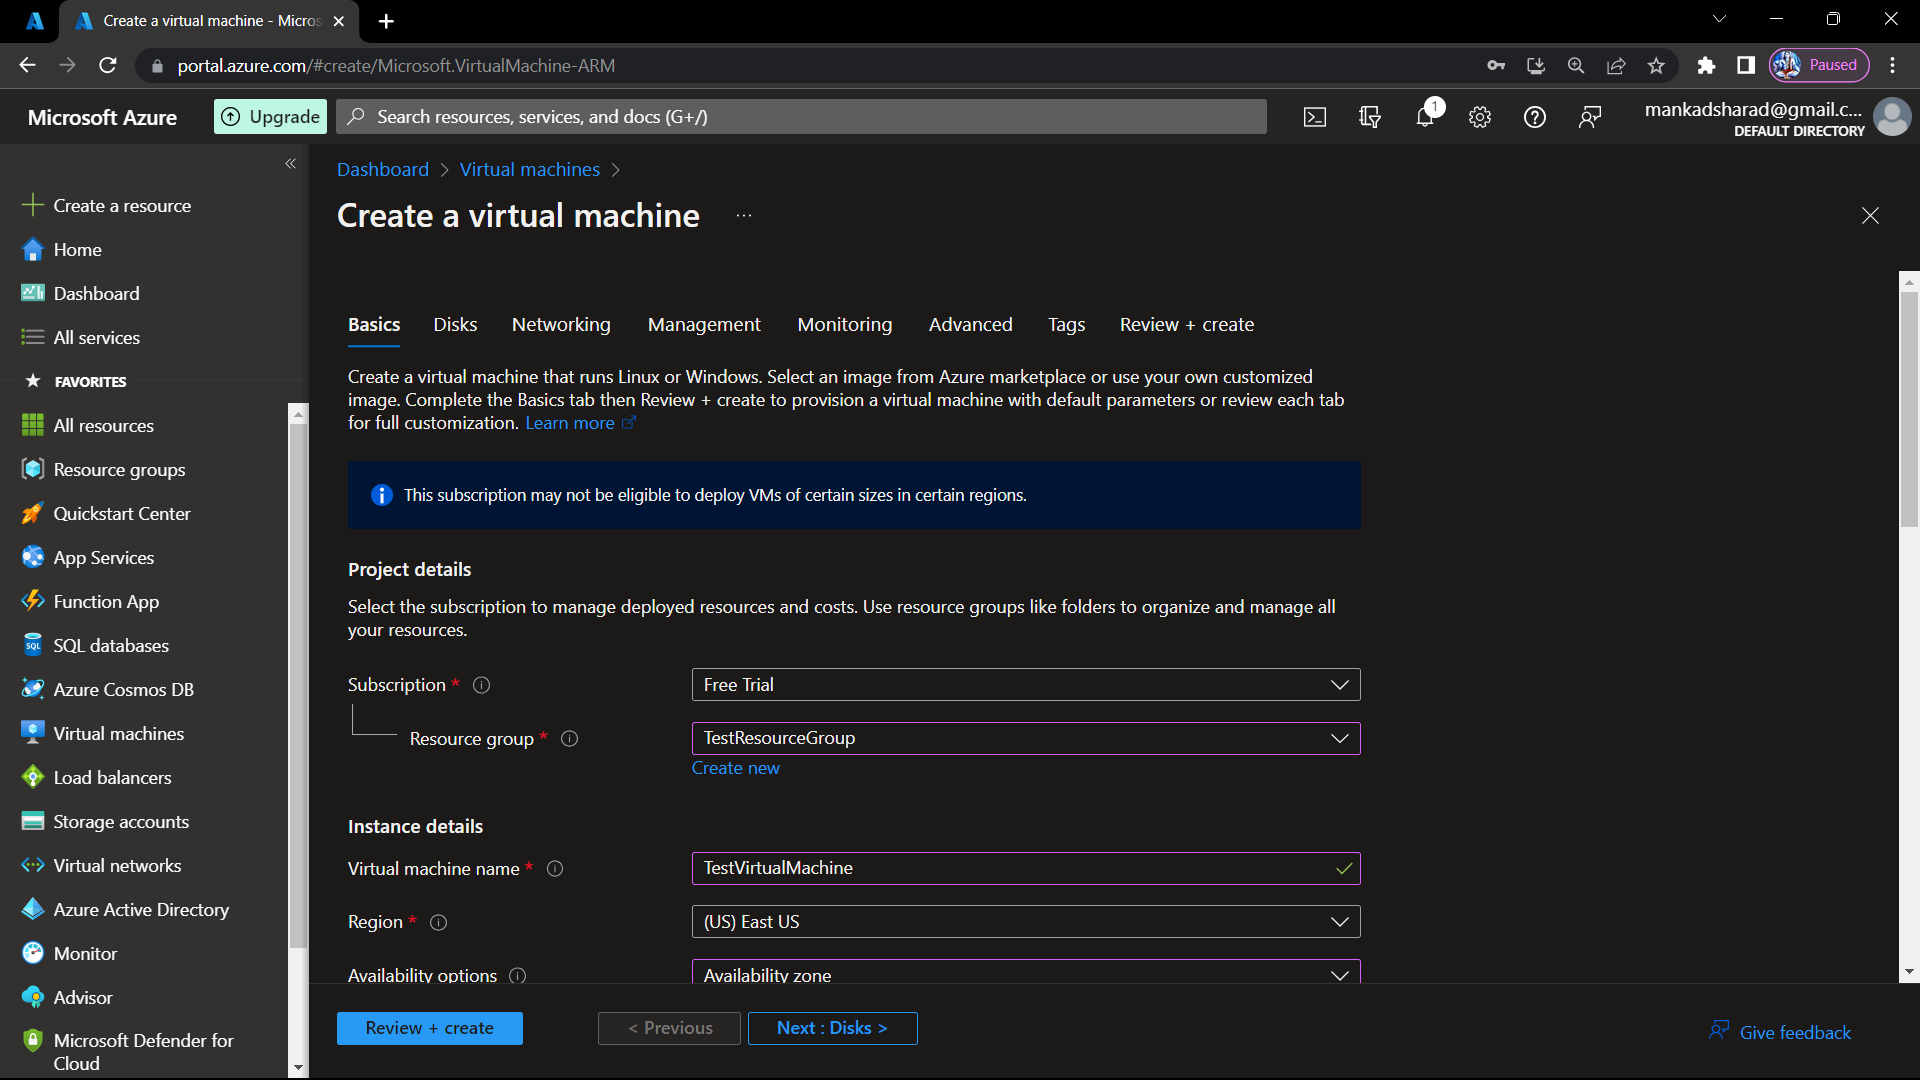
Step-20 In the Basics tab:
Select your Subscription.
Create or select a Resource Group as TestResourceGroup.
Choose a virtual machine Name as TestVirtualMachine.
Select the Region where you want to deploy the virtual machine.
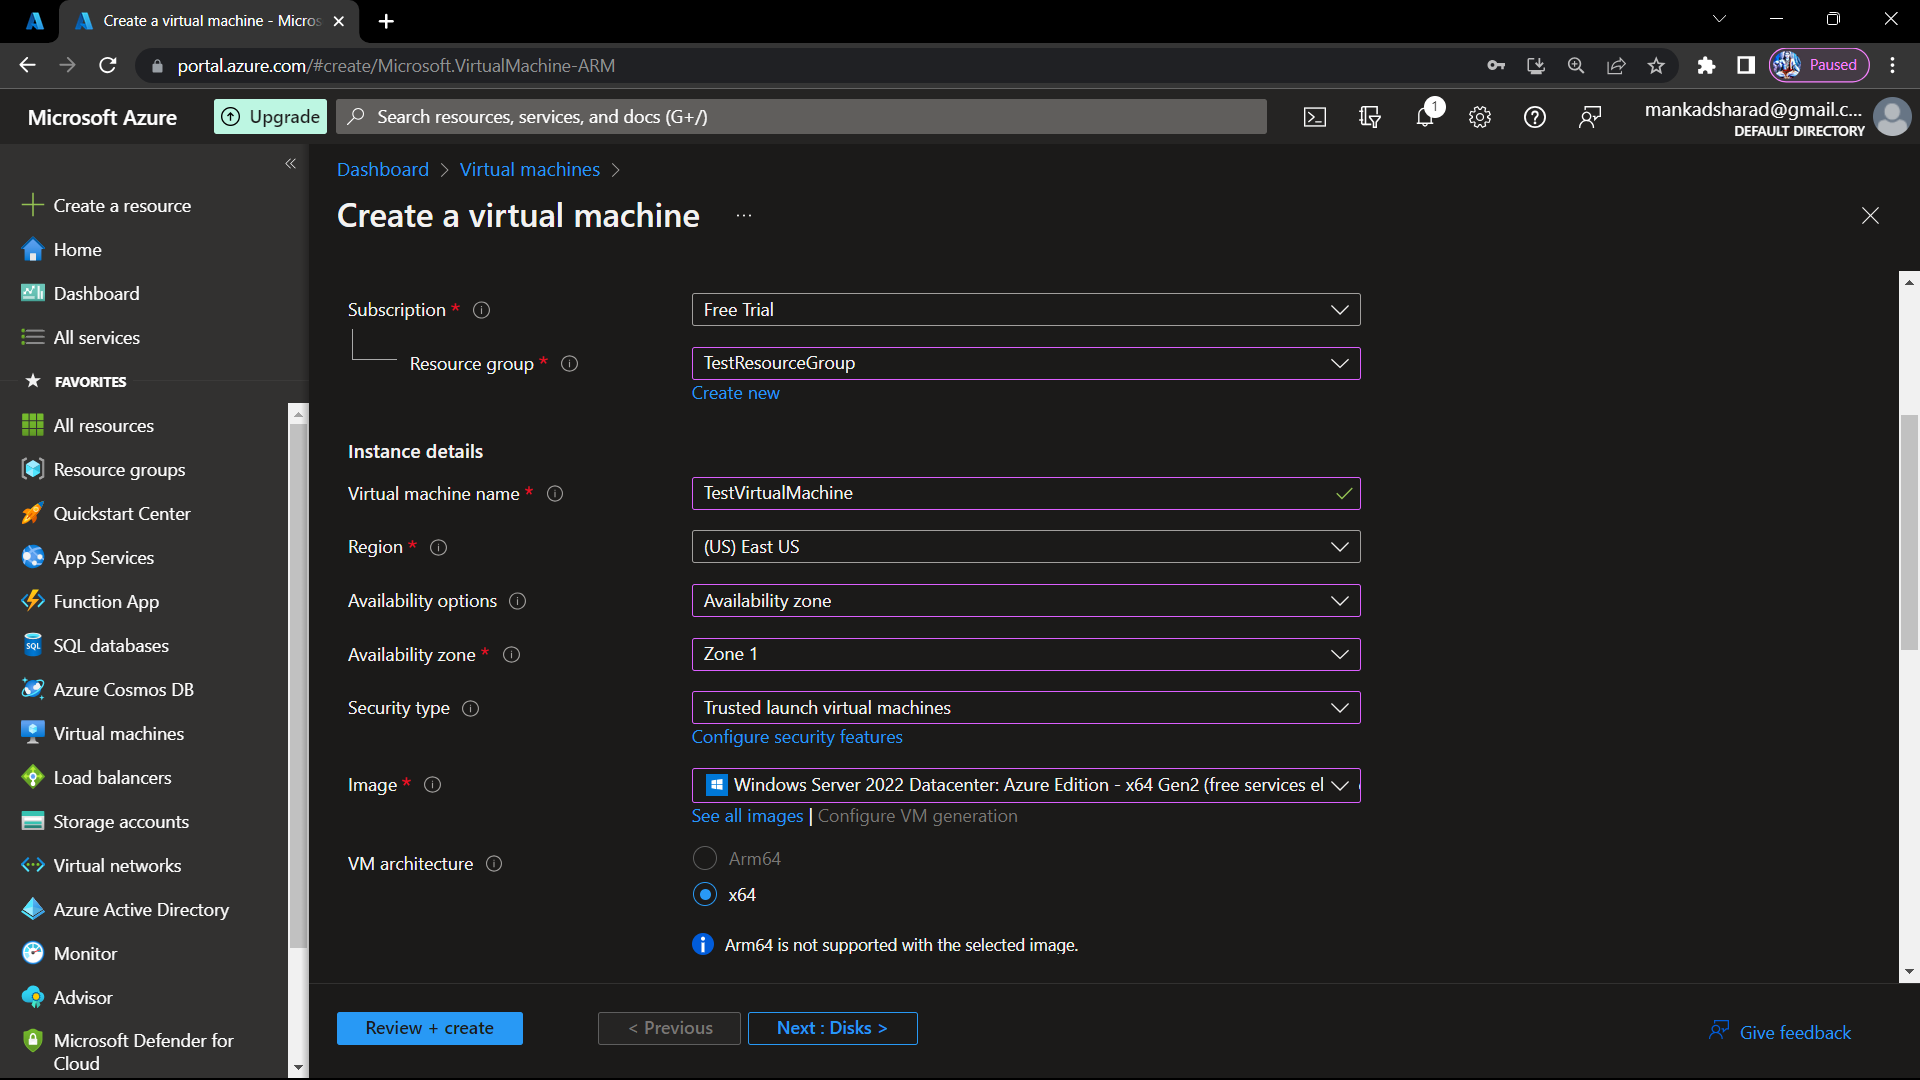
Choose a suitable Availability Options based on your requirements.
Select an Image that corresponds to the operating system you want to use.
Choose a Size for your virtual machine based on the desired compute power and memory.
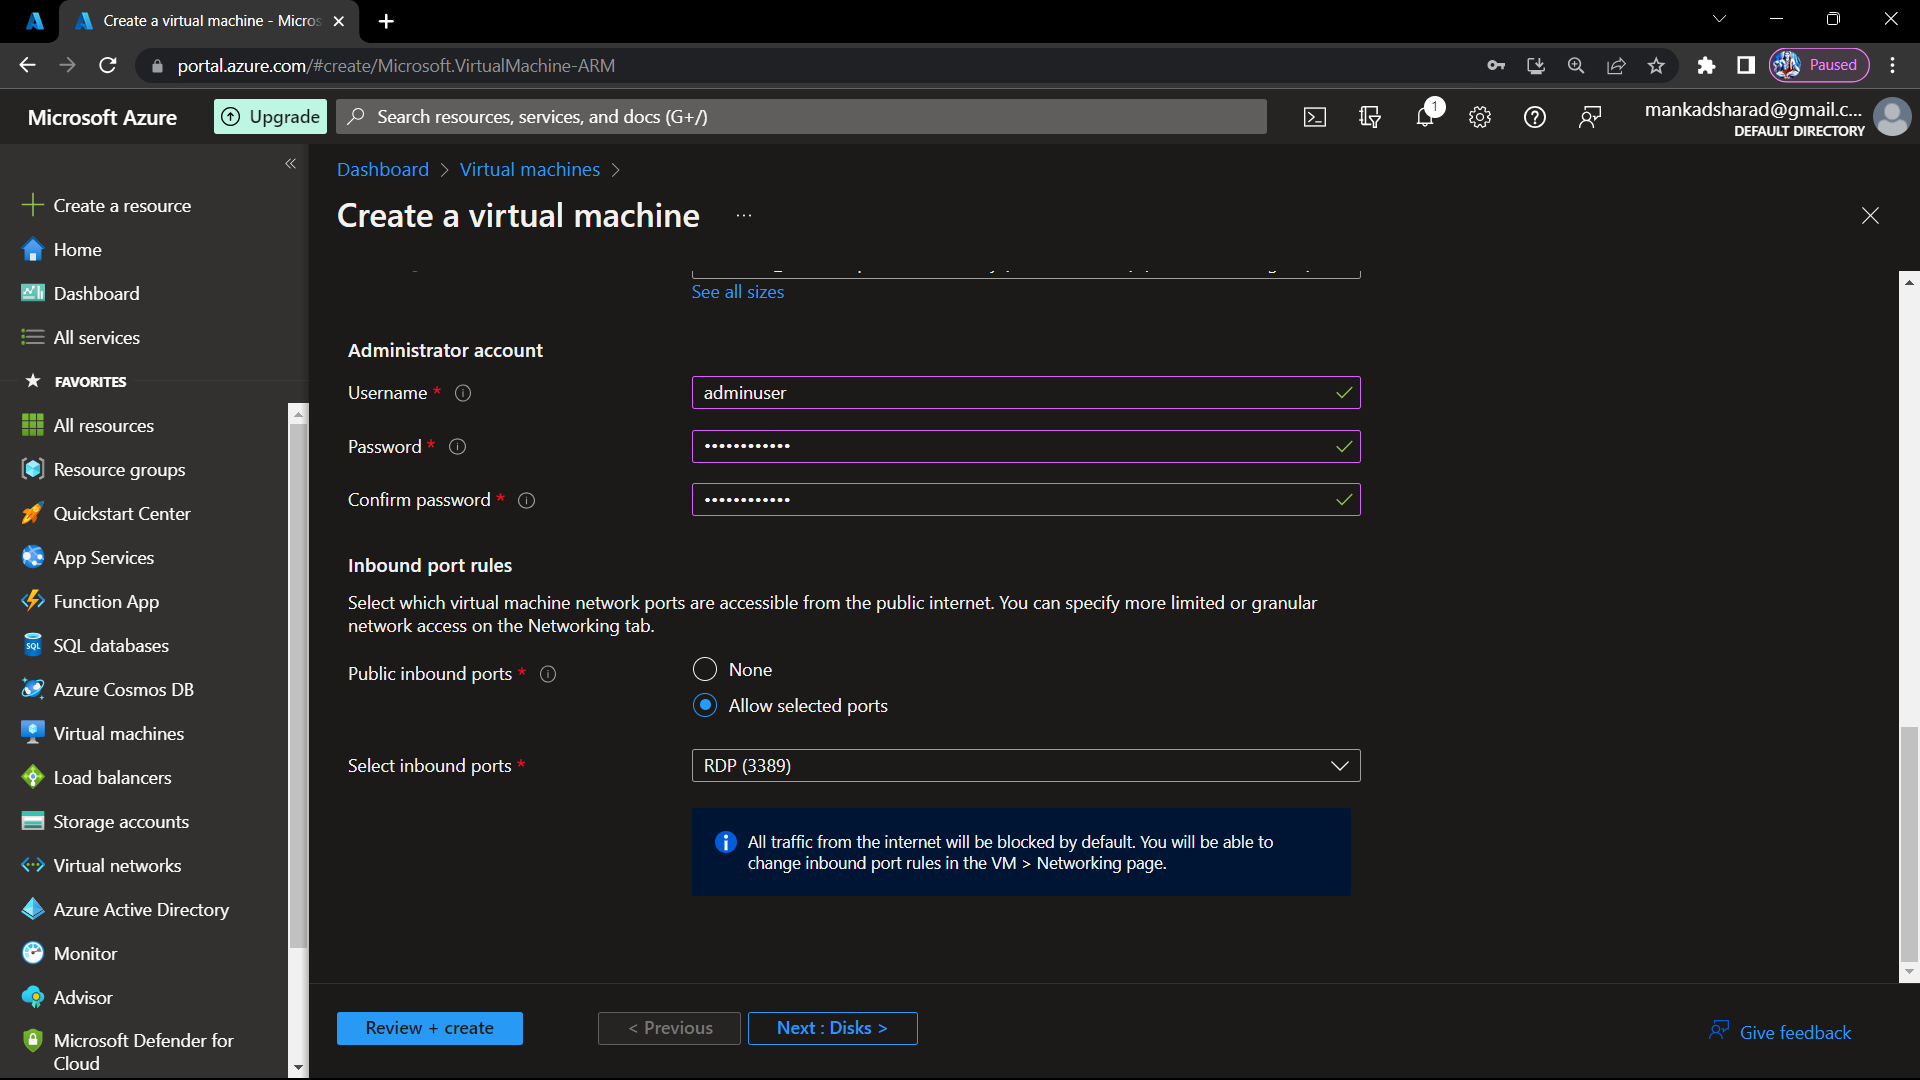
Specify the Administrator account username and password for the virtual machine.
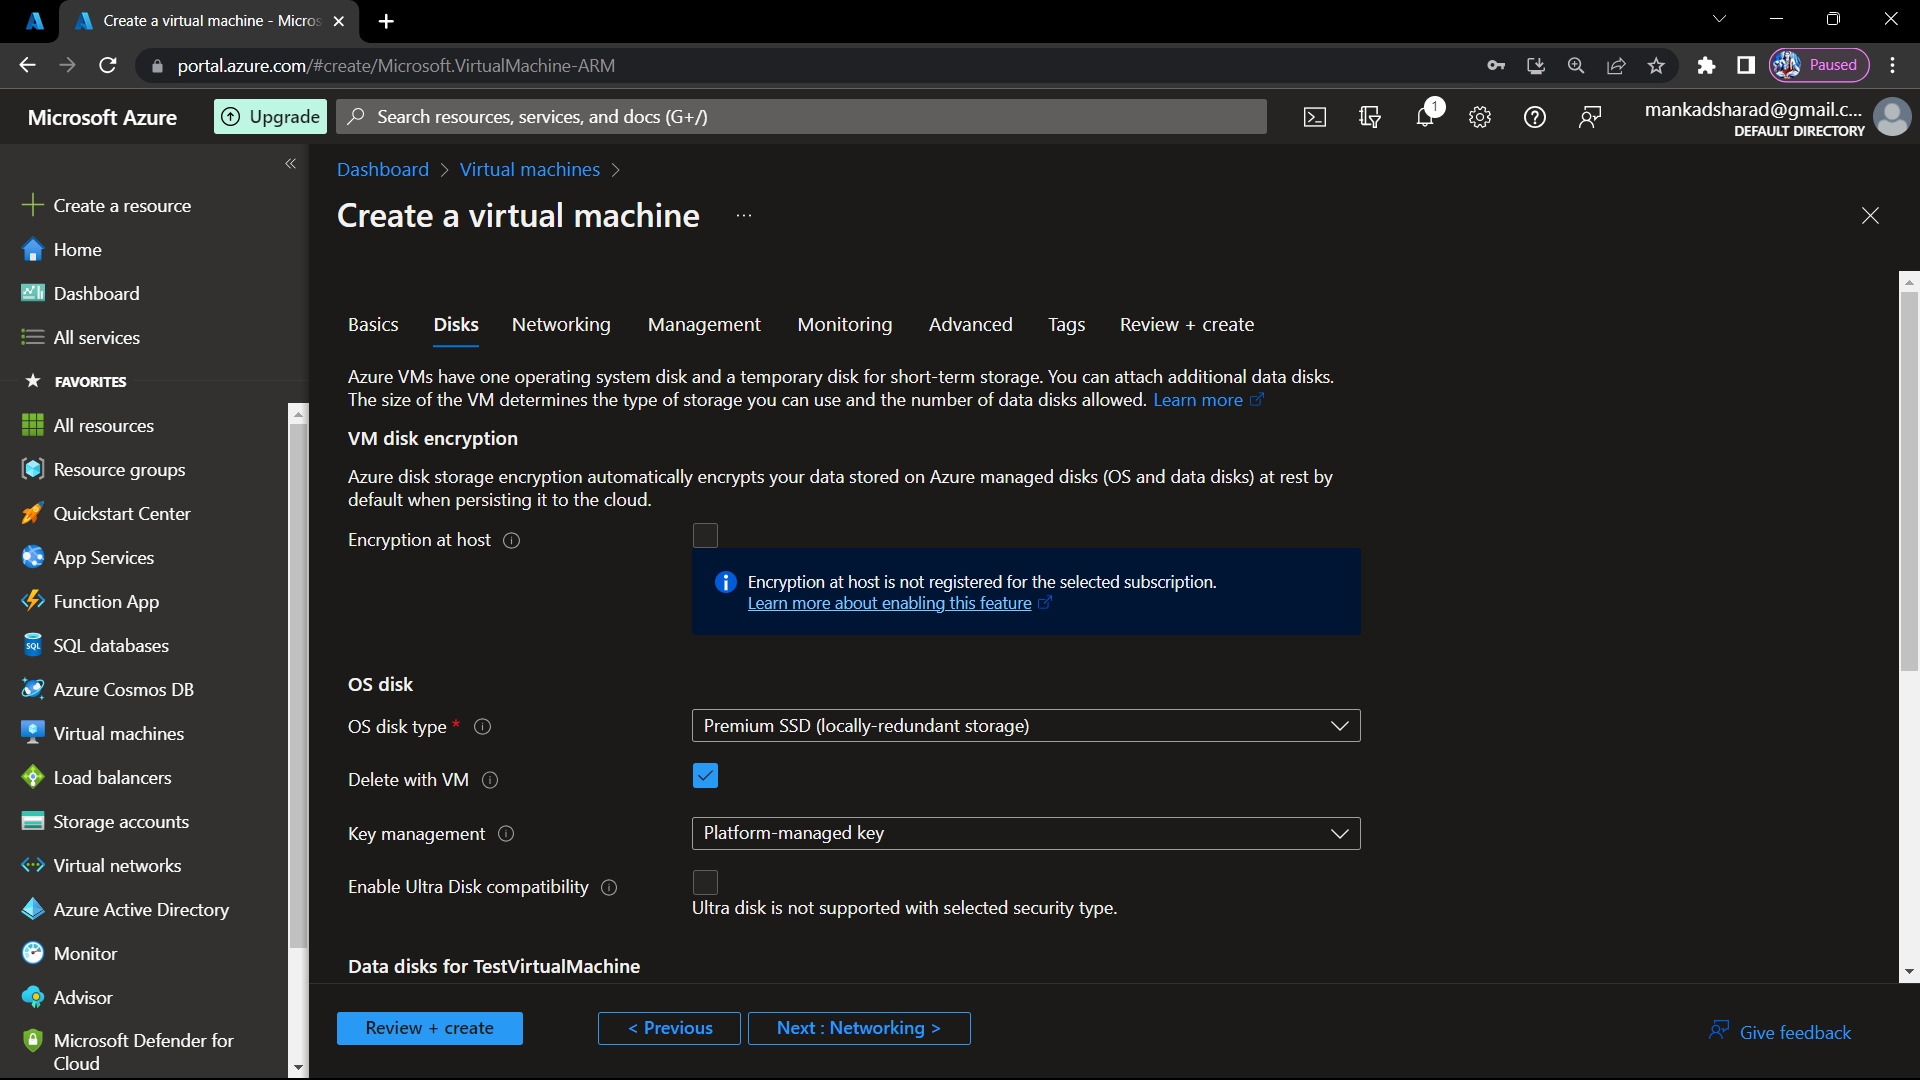
Step-21 Click on the "Next" button to proceed to the Disks tab.
Configure the OS disk and data disks as per your requirements or use the default settings.
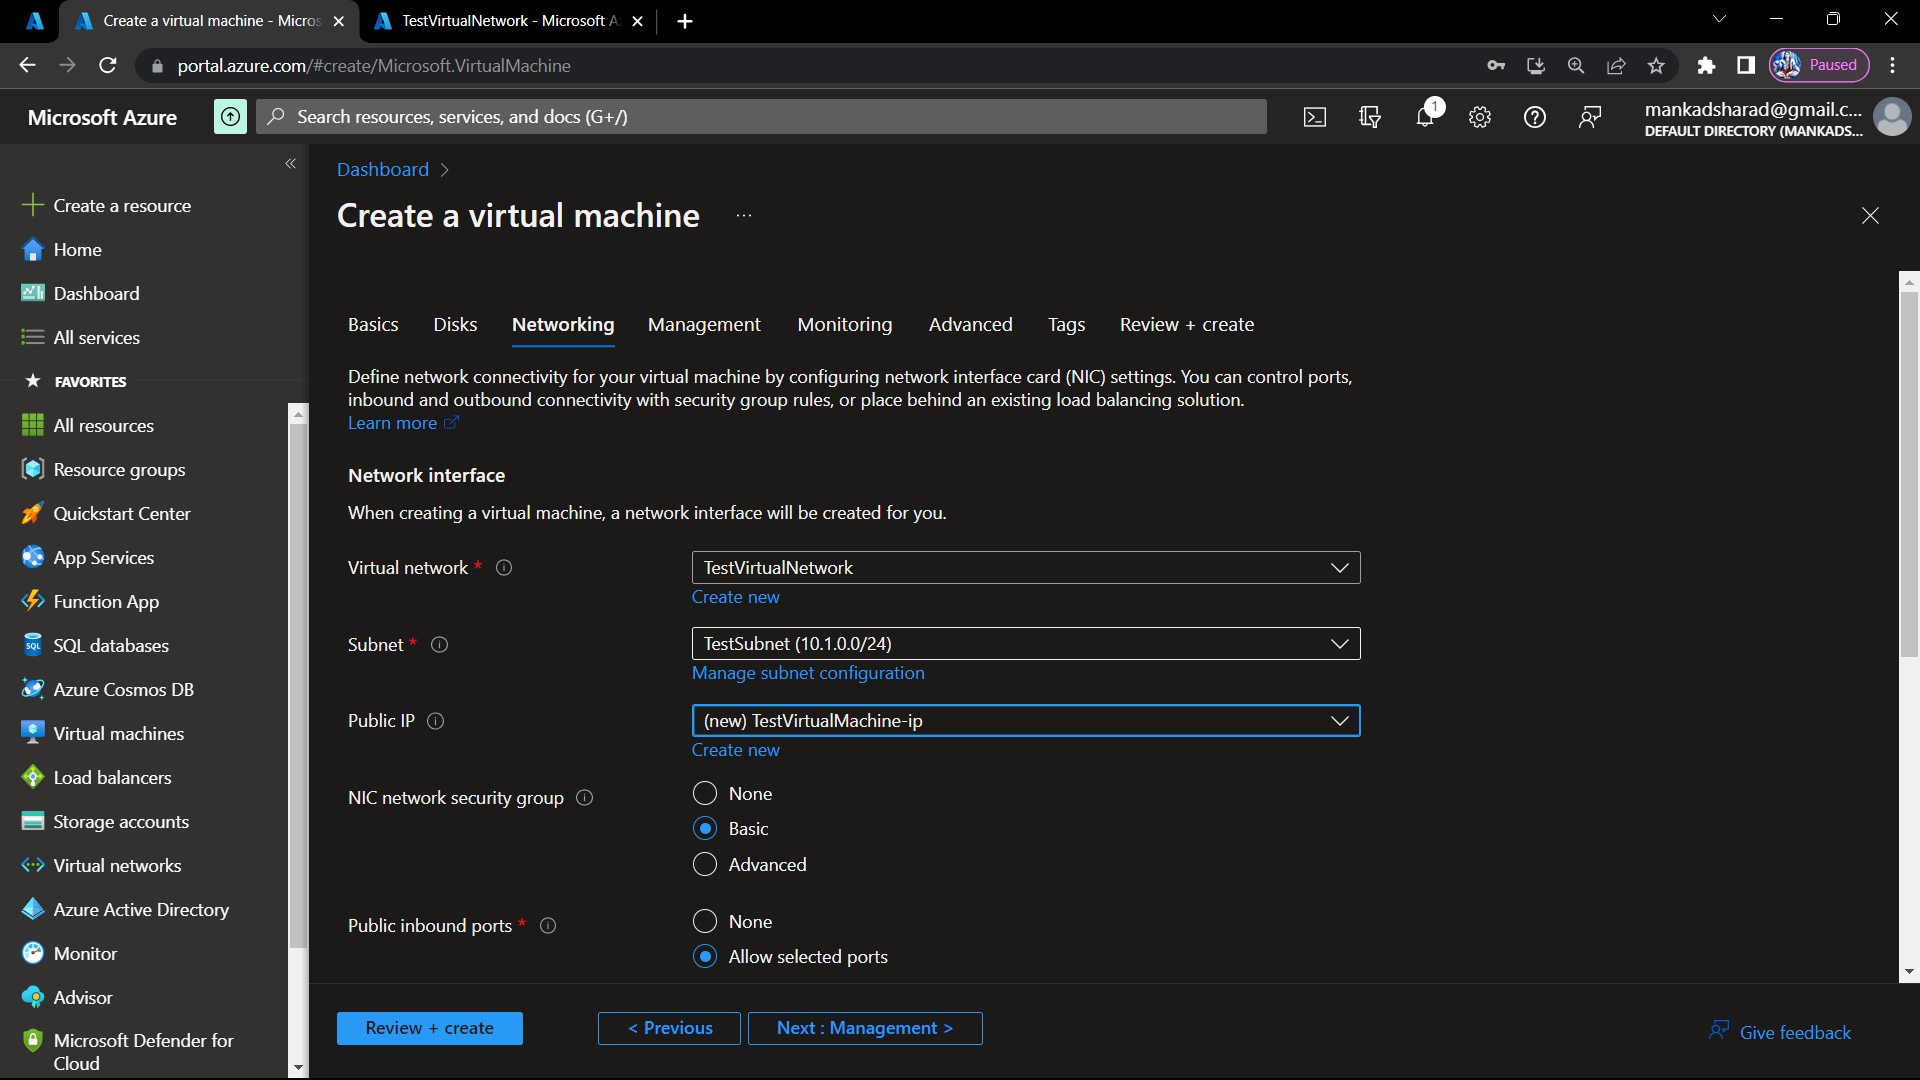
Step-22 On networking tab, select virtual network, subnet and enter all other details.
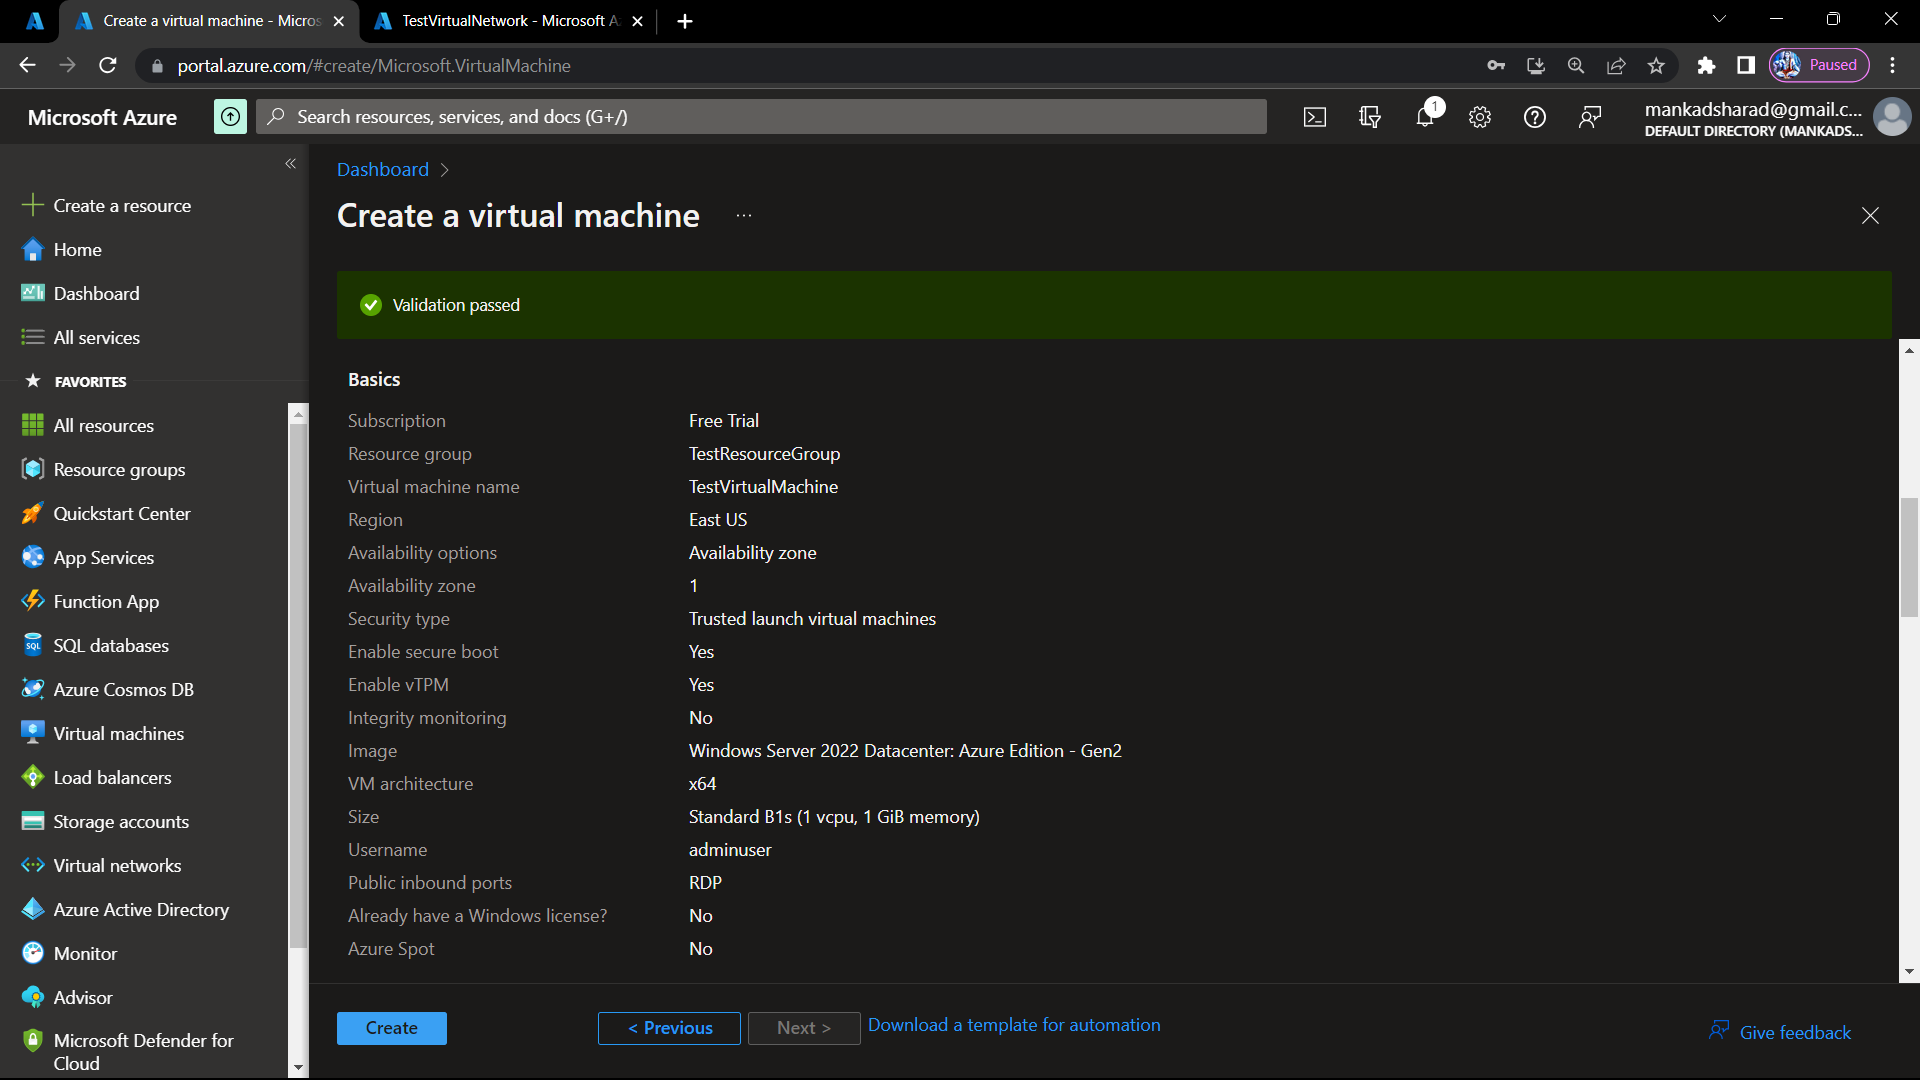
Step-23 Keep all other details as default. go to review + create tab. review all the details and click on create button.
Step-24 After clicking on create it will take some time to complete deployment process. after completetion of that our virtual machine is created in a virtual network.
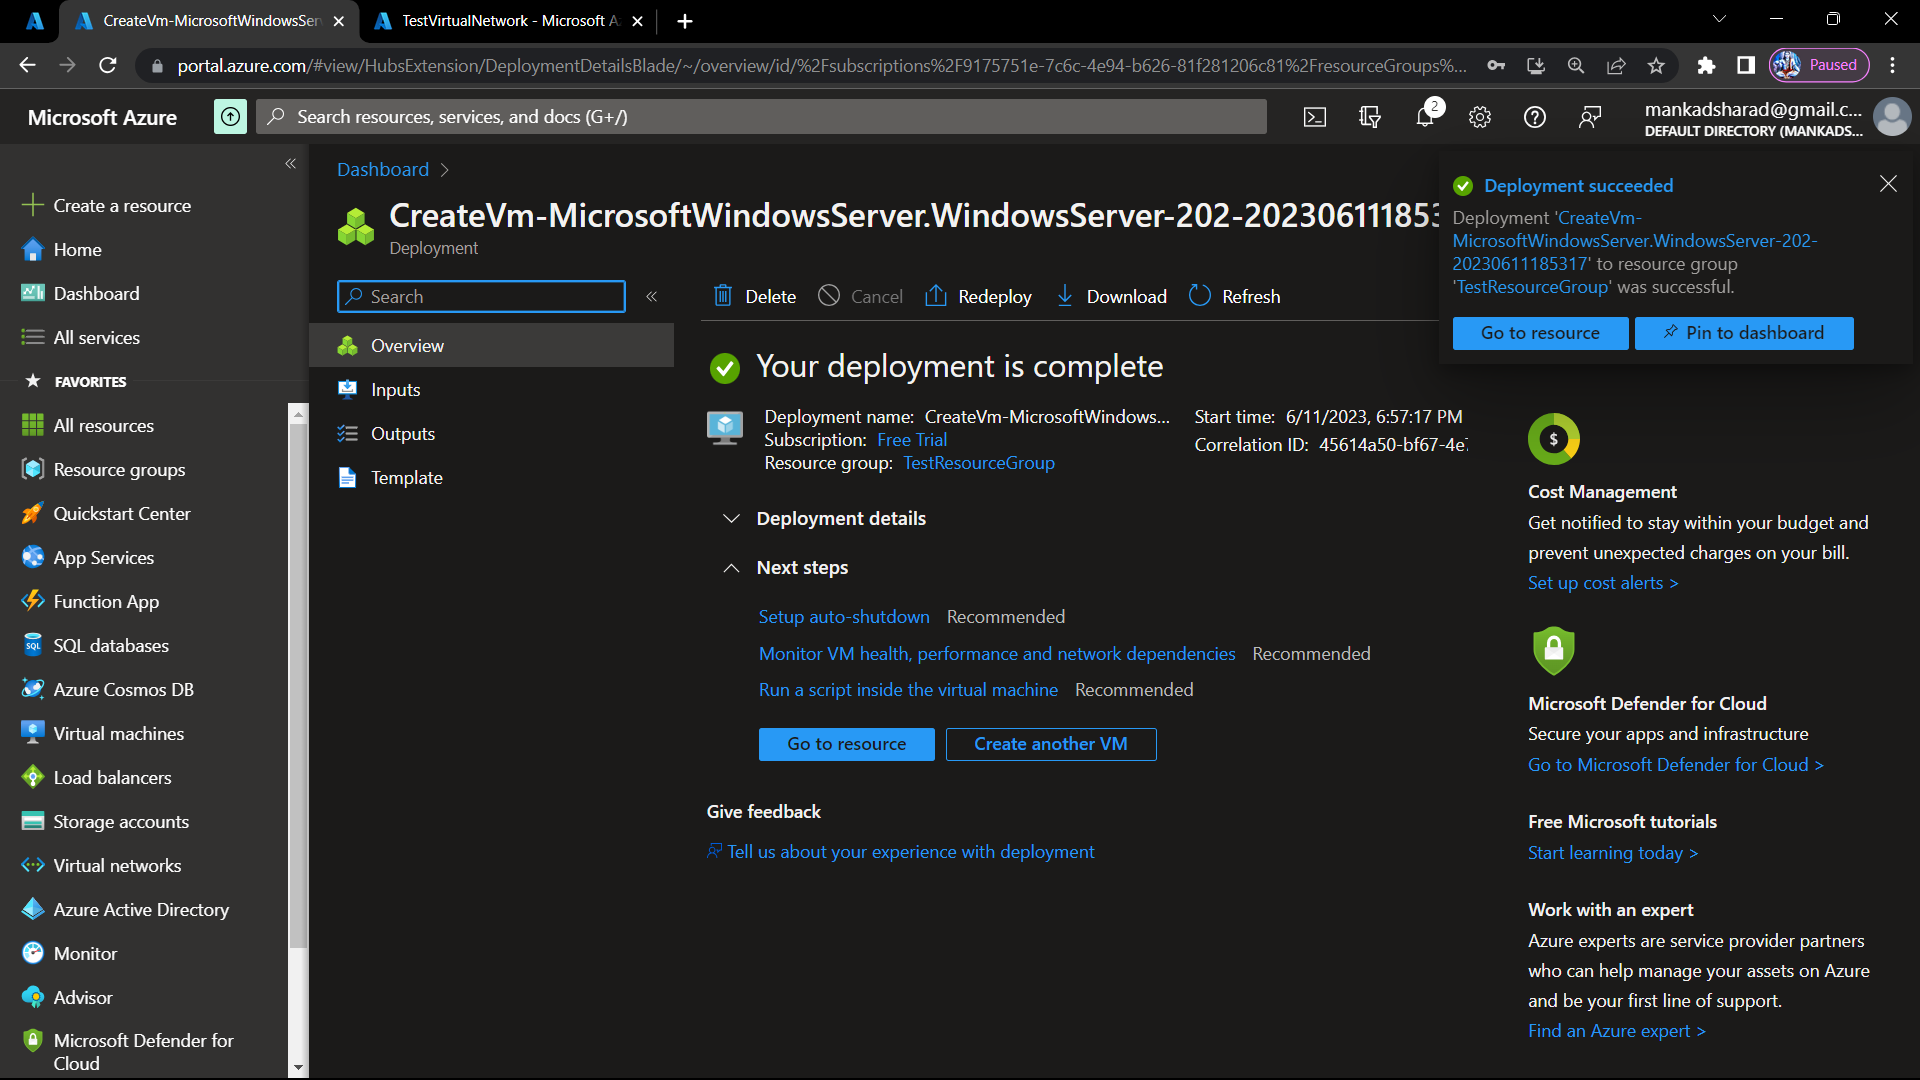
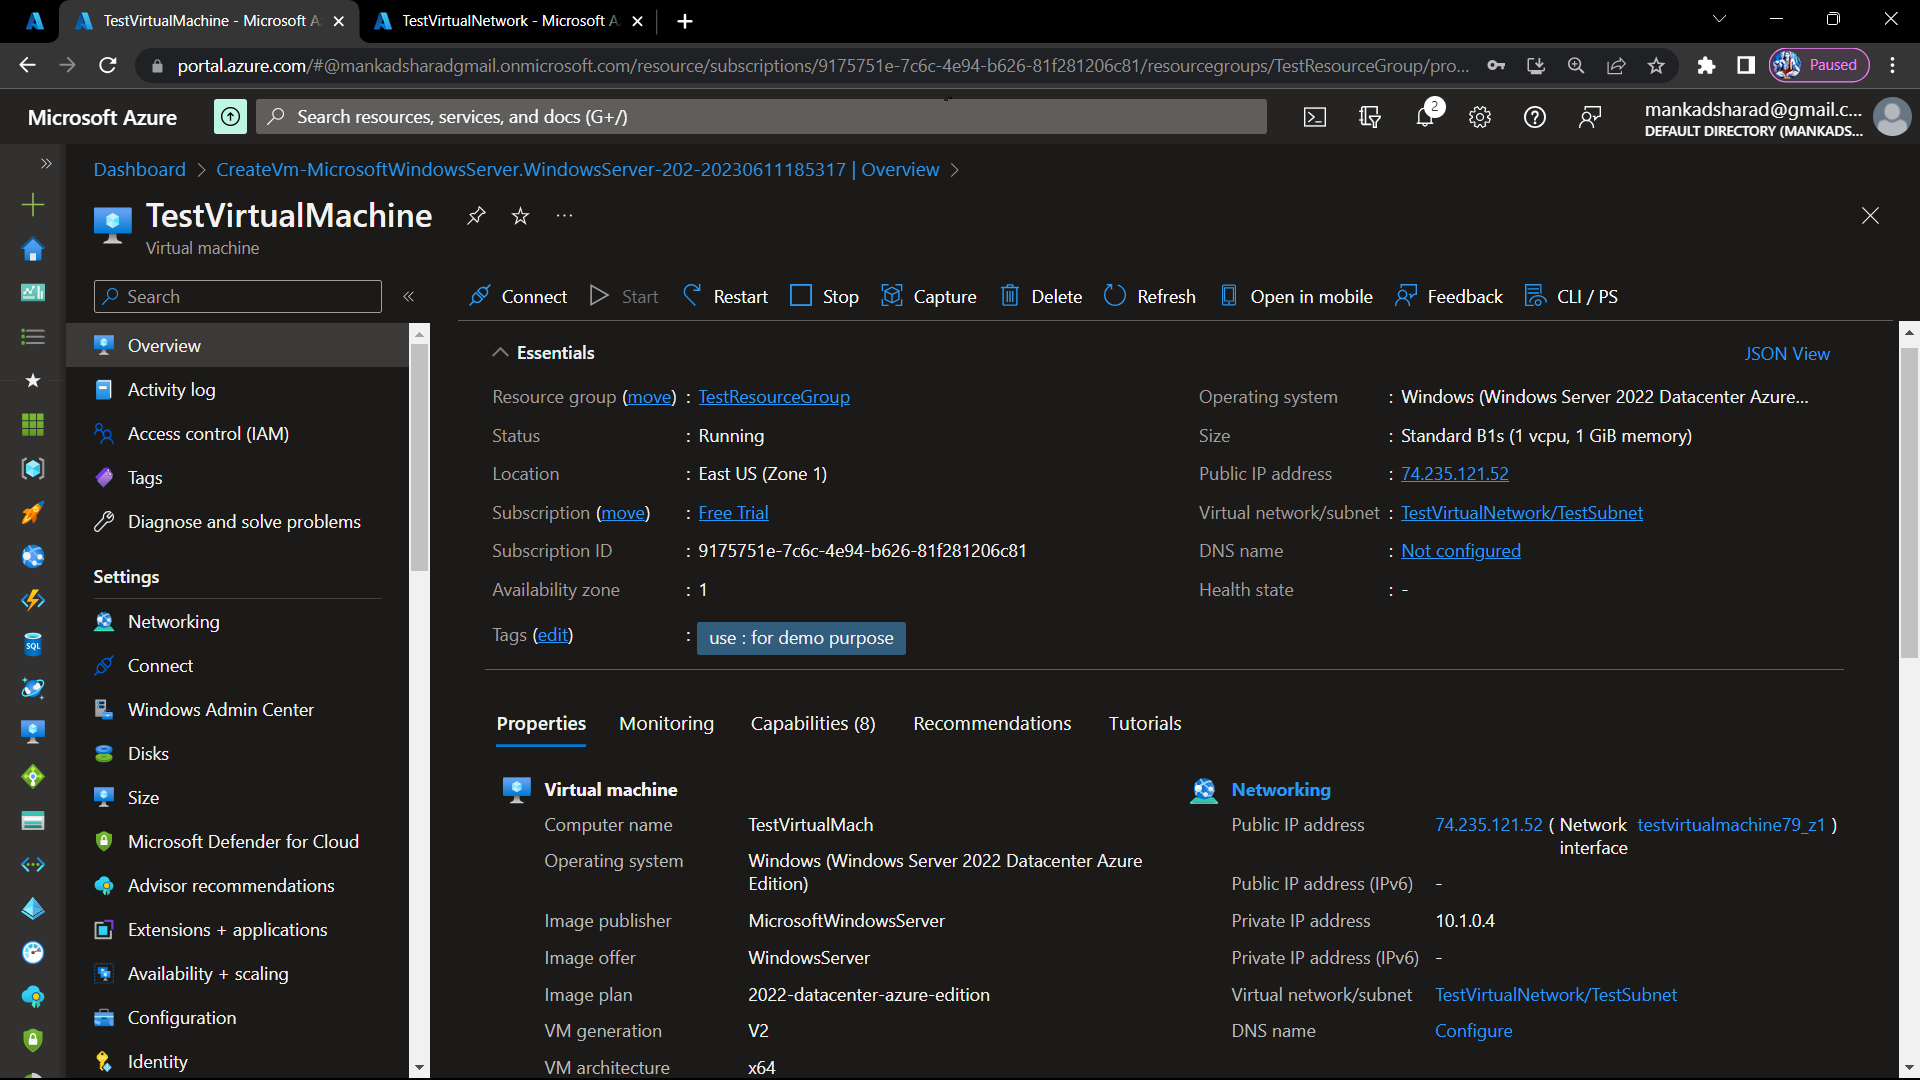
Step-25 Click on Go to resource to see all the details of virtual machine.
In conclusion, we have explored the key concepts of Virtual Machines, Virtual Networks, and Resource Groups in Azure and learned how they form the foundation of a robust cloud infrastructure. By following the step-by-step guide provided in this blog, you have gained the knowledge and practical know-how to create your own virtual machine within a virtual network and resource group in Azure. Embracing cloud computing and leveraging these powerful tools can unlock new possibilities for scalability, flexibility, and cost optimization.


